Import Replicator
Confluent Replicator jobs can be imported into the suite to leverage monitoring, cutover, and management capabilities for replication tasks that are already running.
Import Workflow
Section titled “Import Workflow”-
Navigate to Getting Started on the Dashboard and select Replicator from the Import Existing Job section.
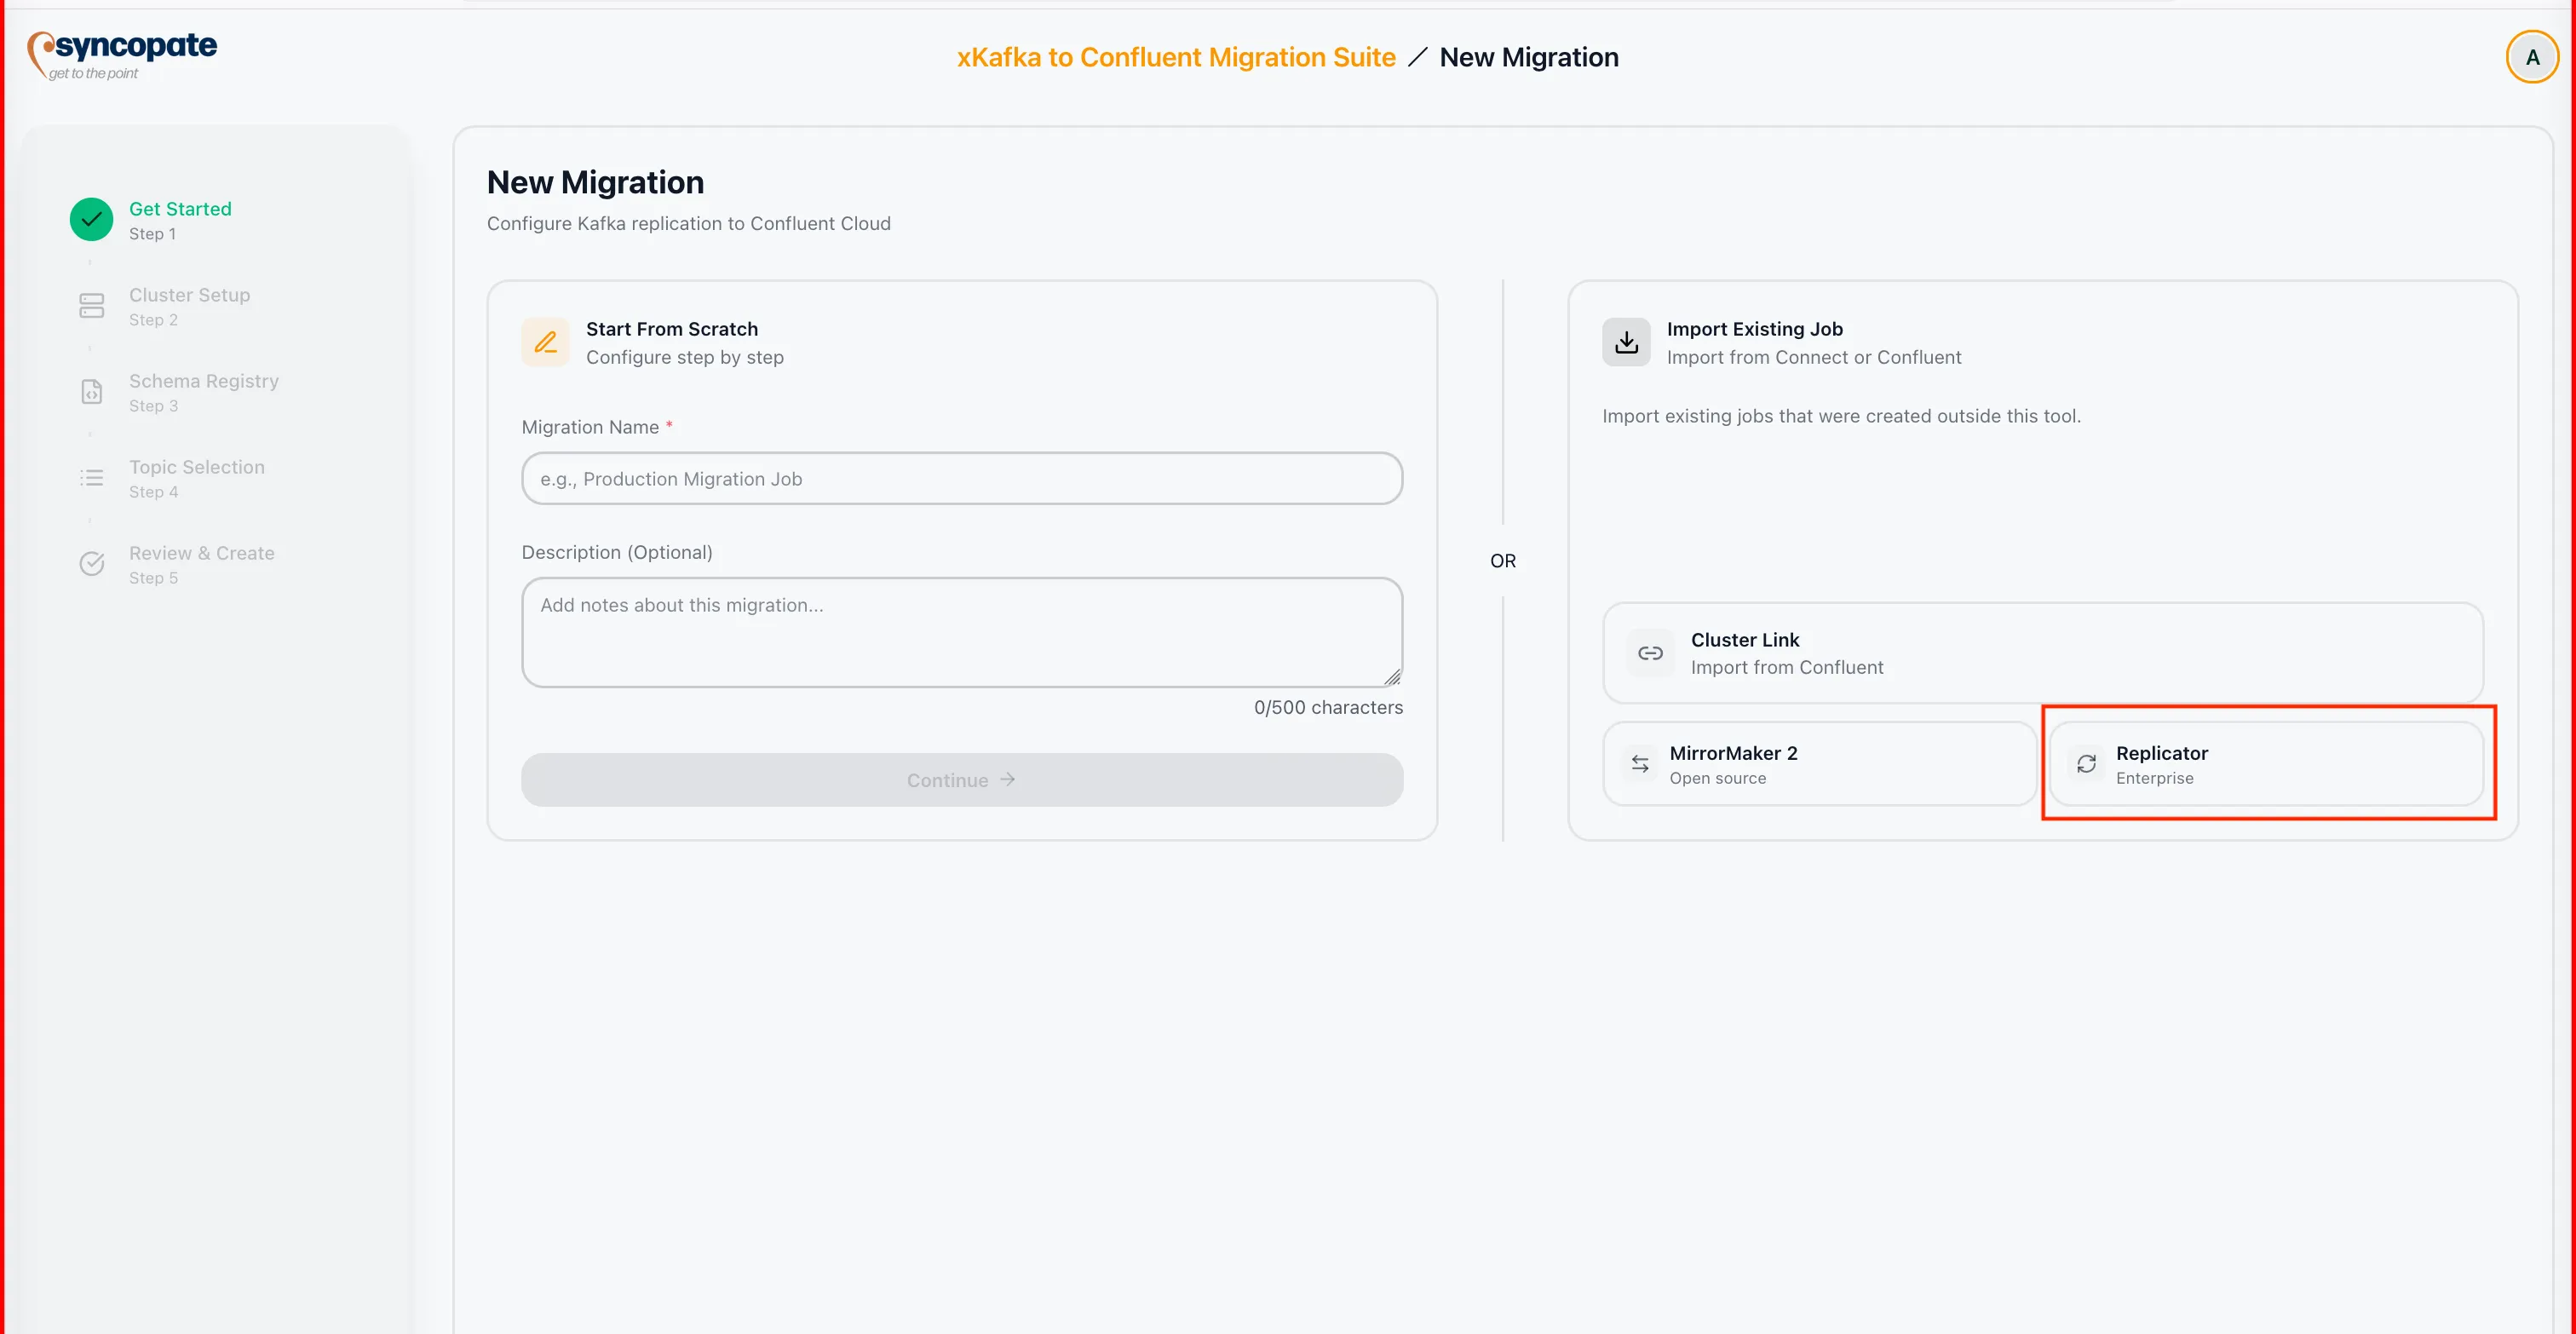
-
Select a Kafka Connect cluster from your registered clusters, or add a new one. The suite connects to the cluster to discover active Replicator tasks.
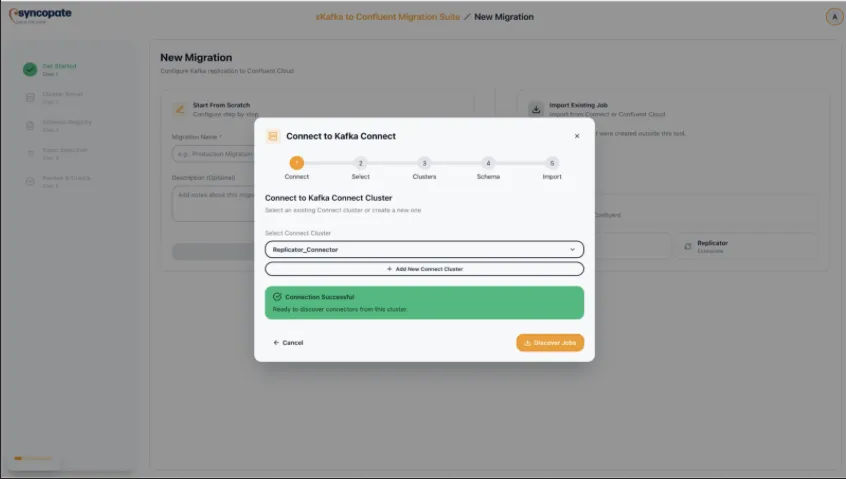
-
Verify the connection to confirm the suite can communicate with the selected cluster.
-
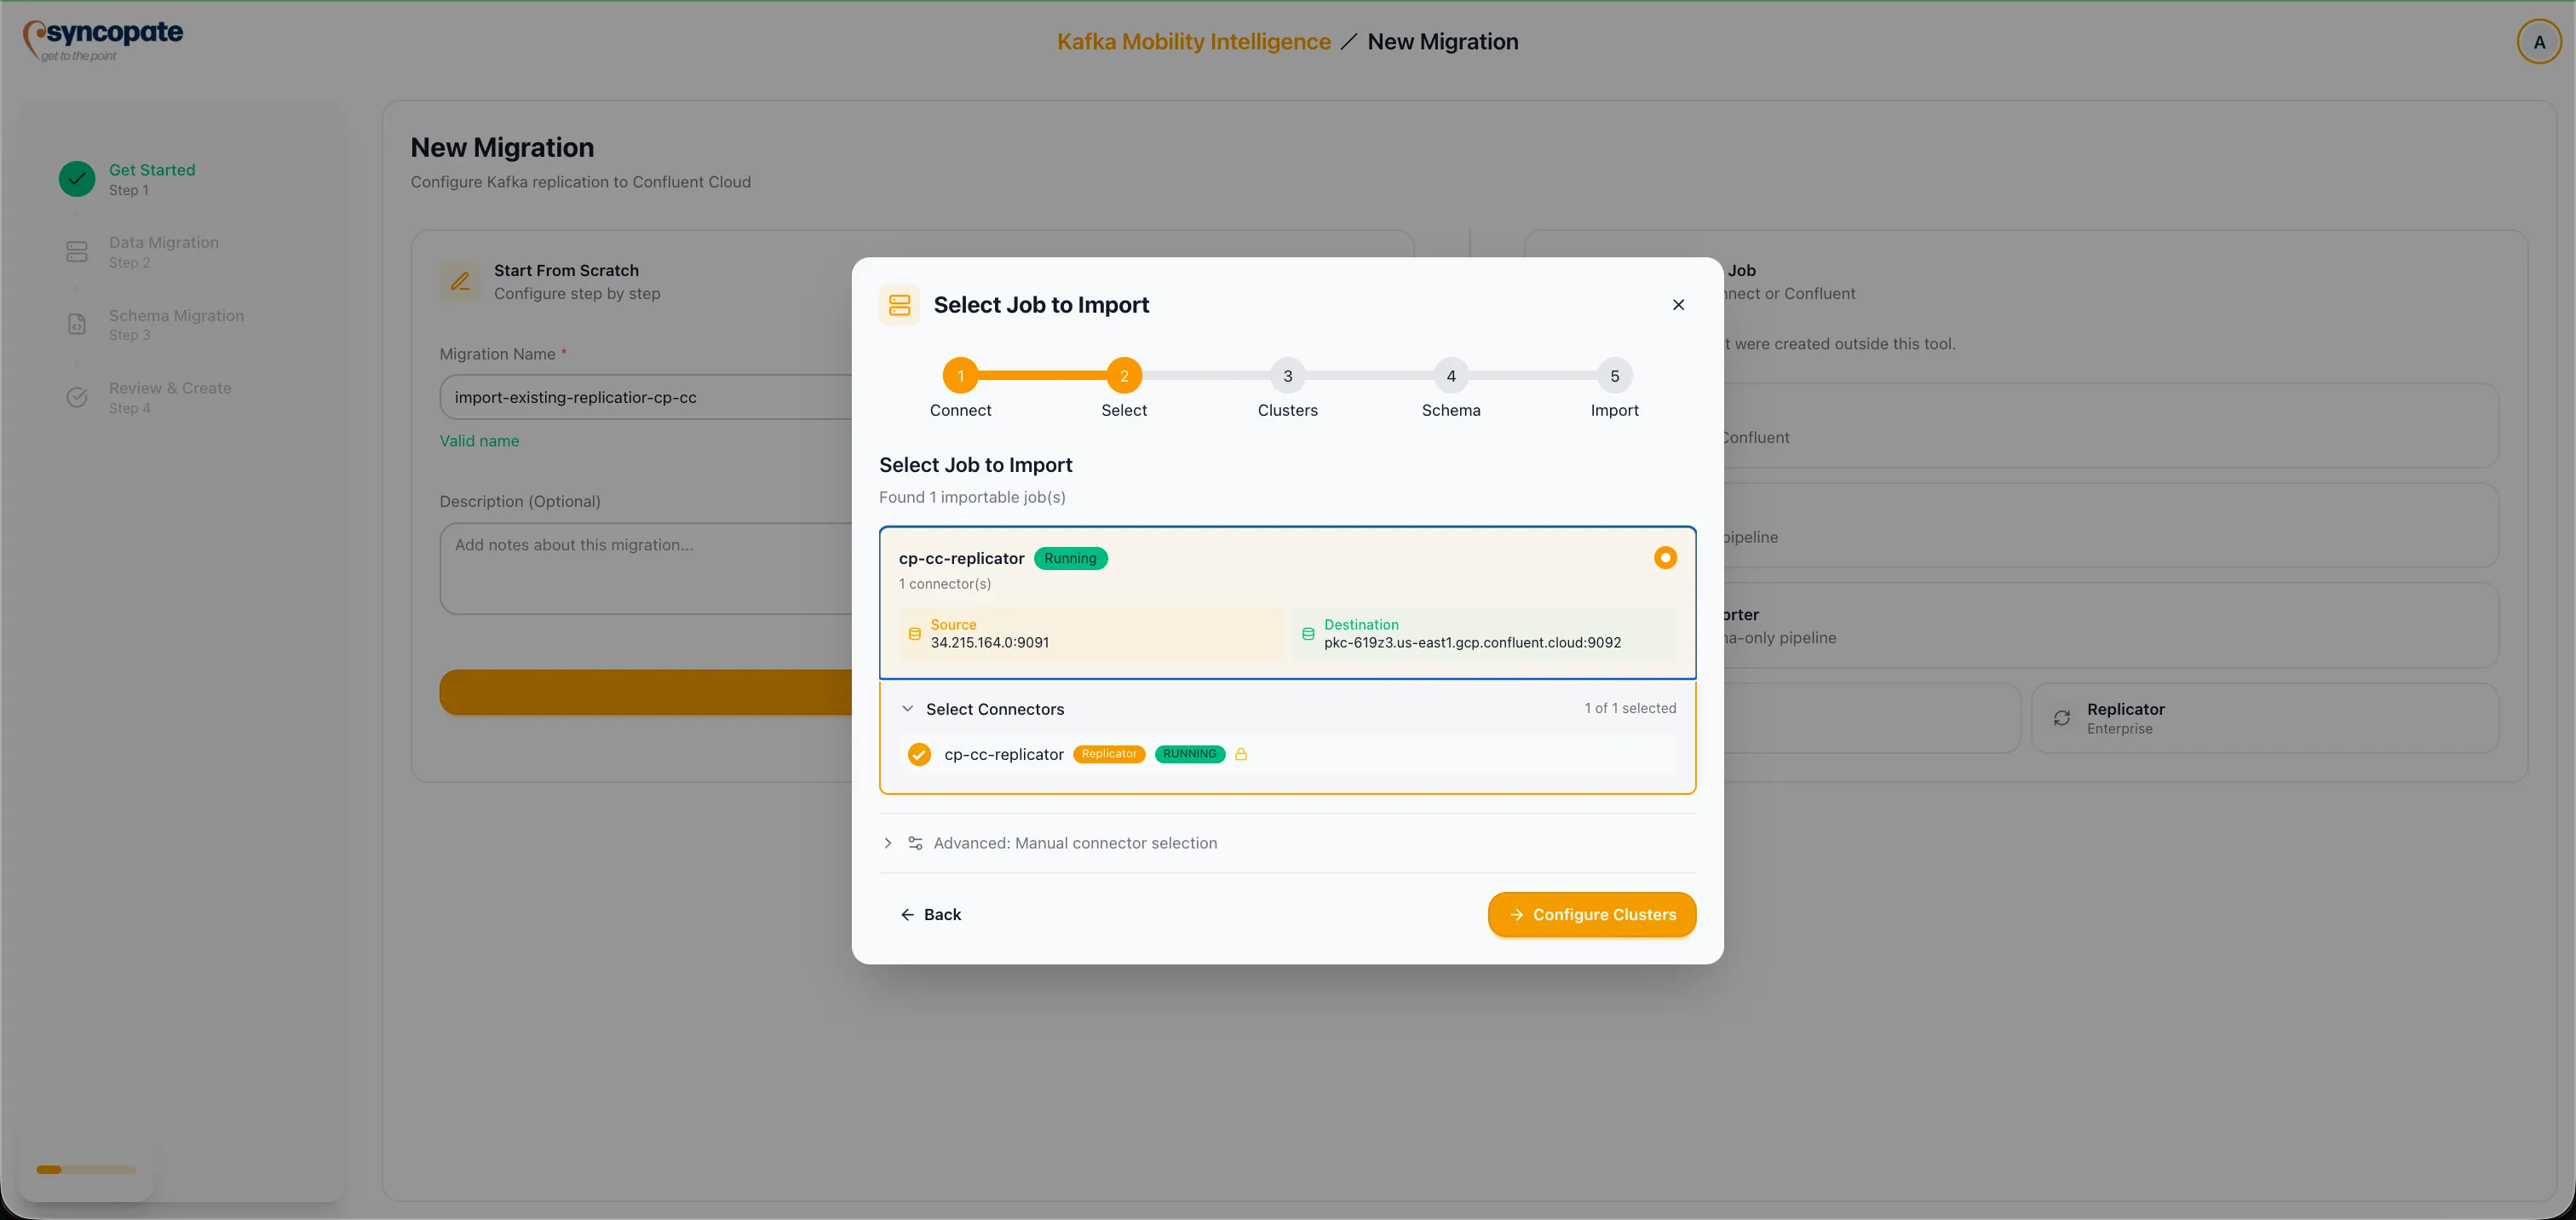
Click Discover Jobs to scan the cluster for active Replicator jobs. The suite lists all discovered jobs with their current state.
-
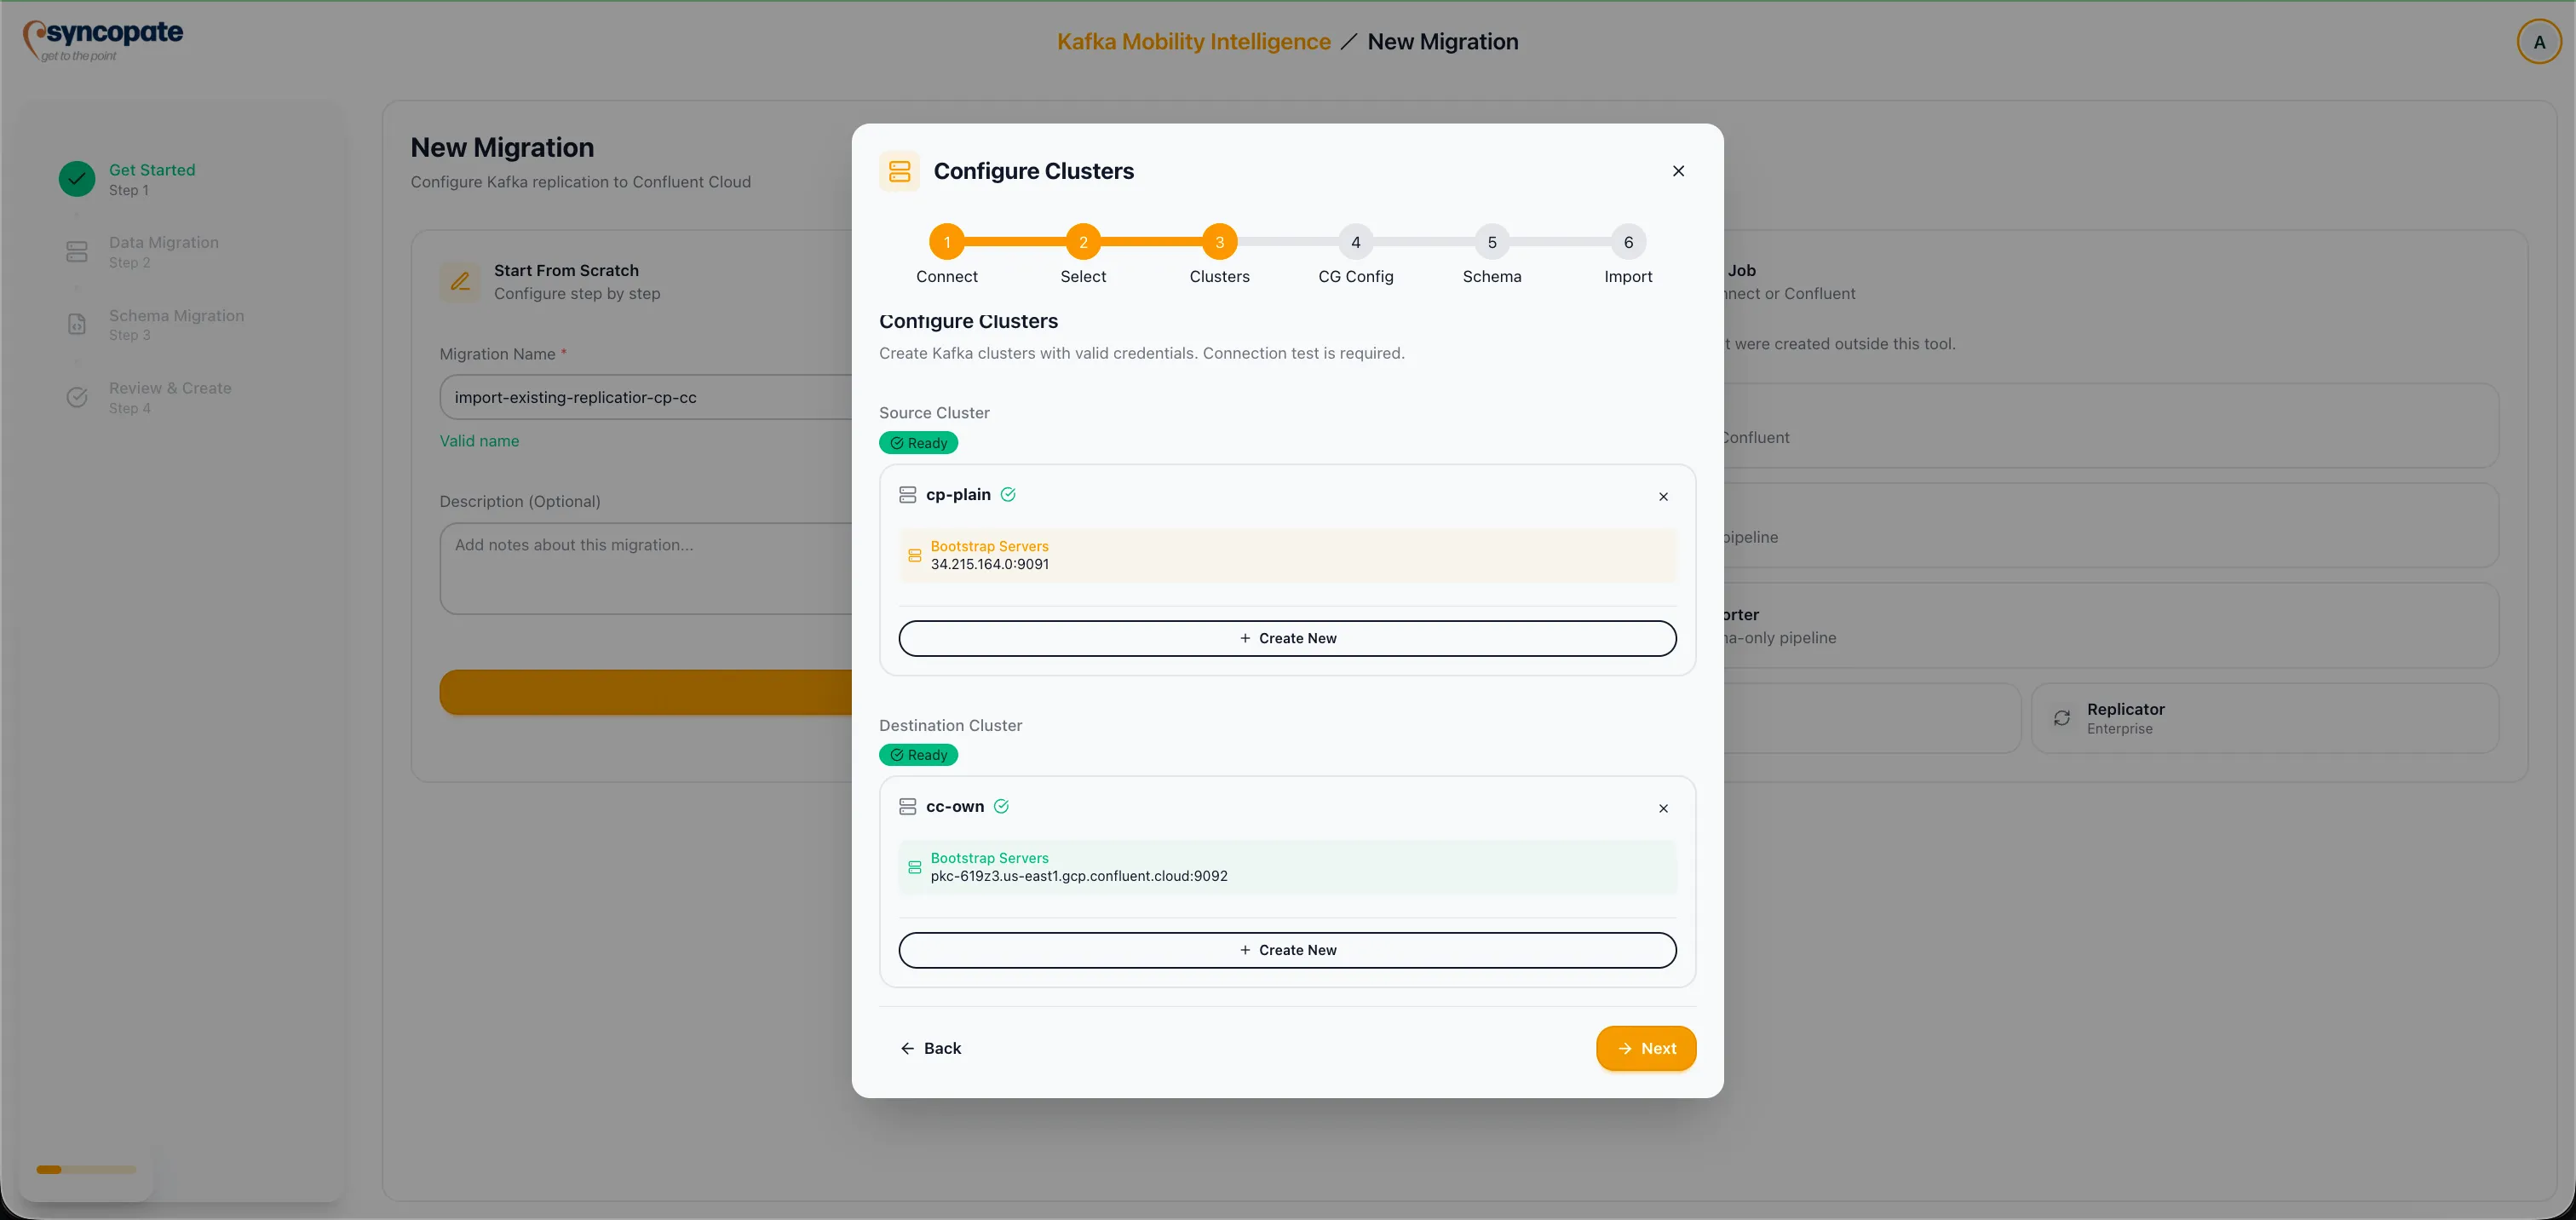
Select the job you want to import. The suite displays the connector groups associated with the job, including source cluster, destination cluster, and replicated topics.
-
Verify the cluster and schema details. Confirm that the source and destination clusters, along with the topic list, match your expectations.
-
Configure schema migration or skip the schema registry step if your migration does not include schemas.
-
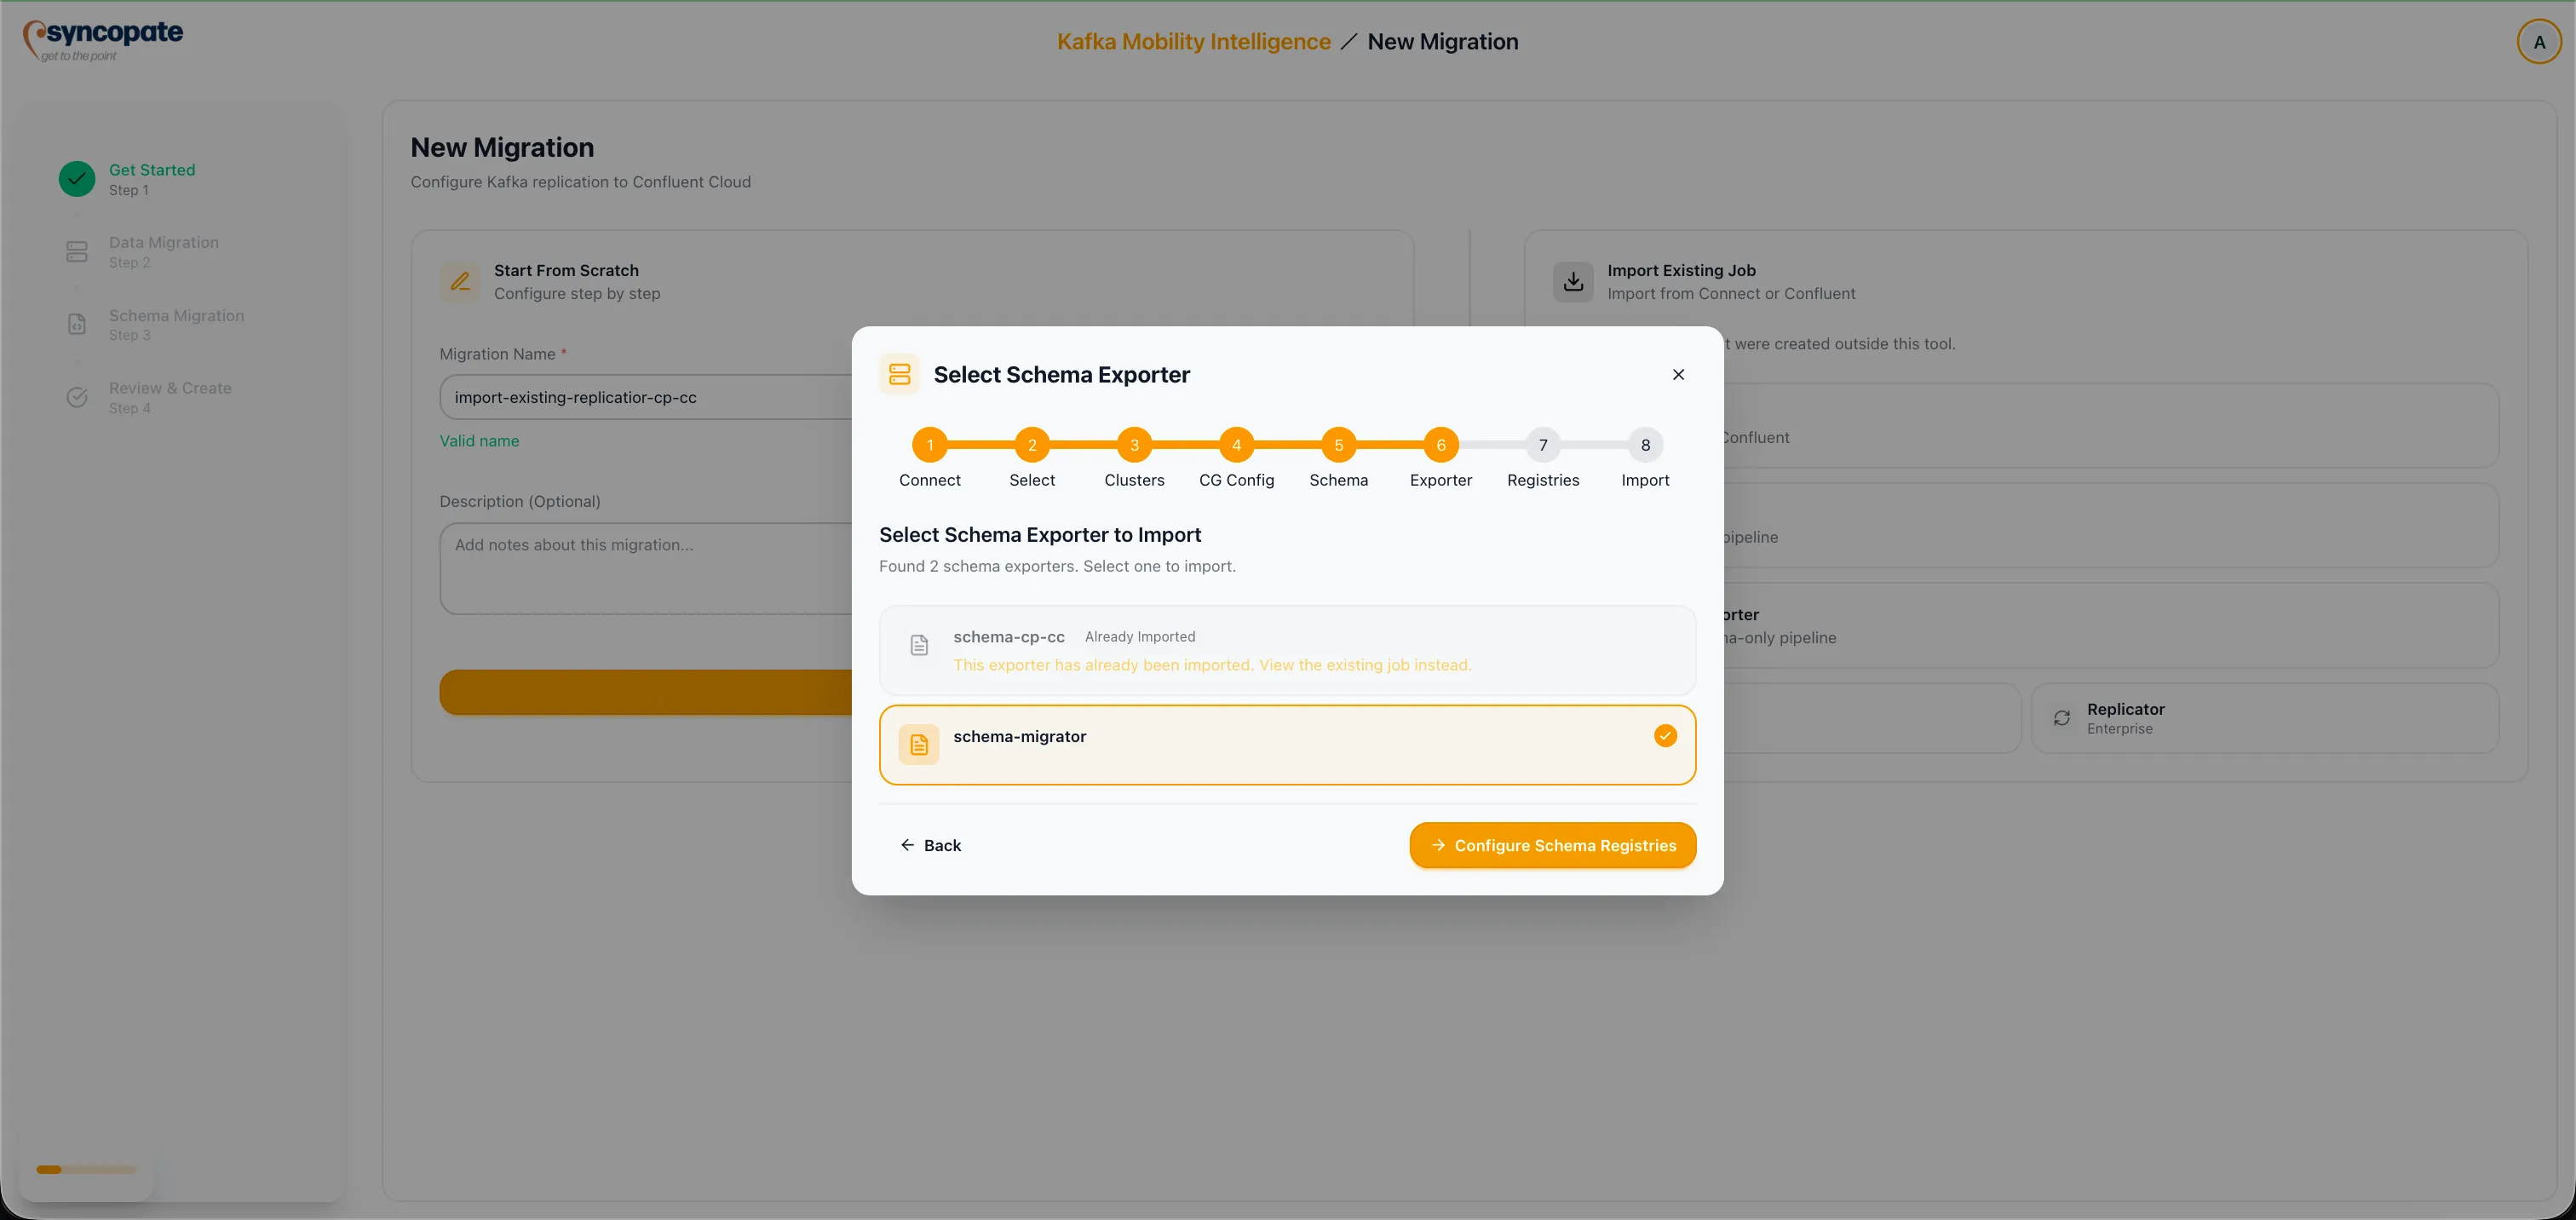
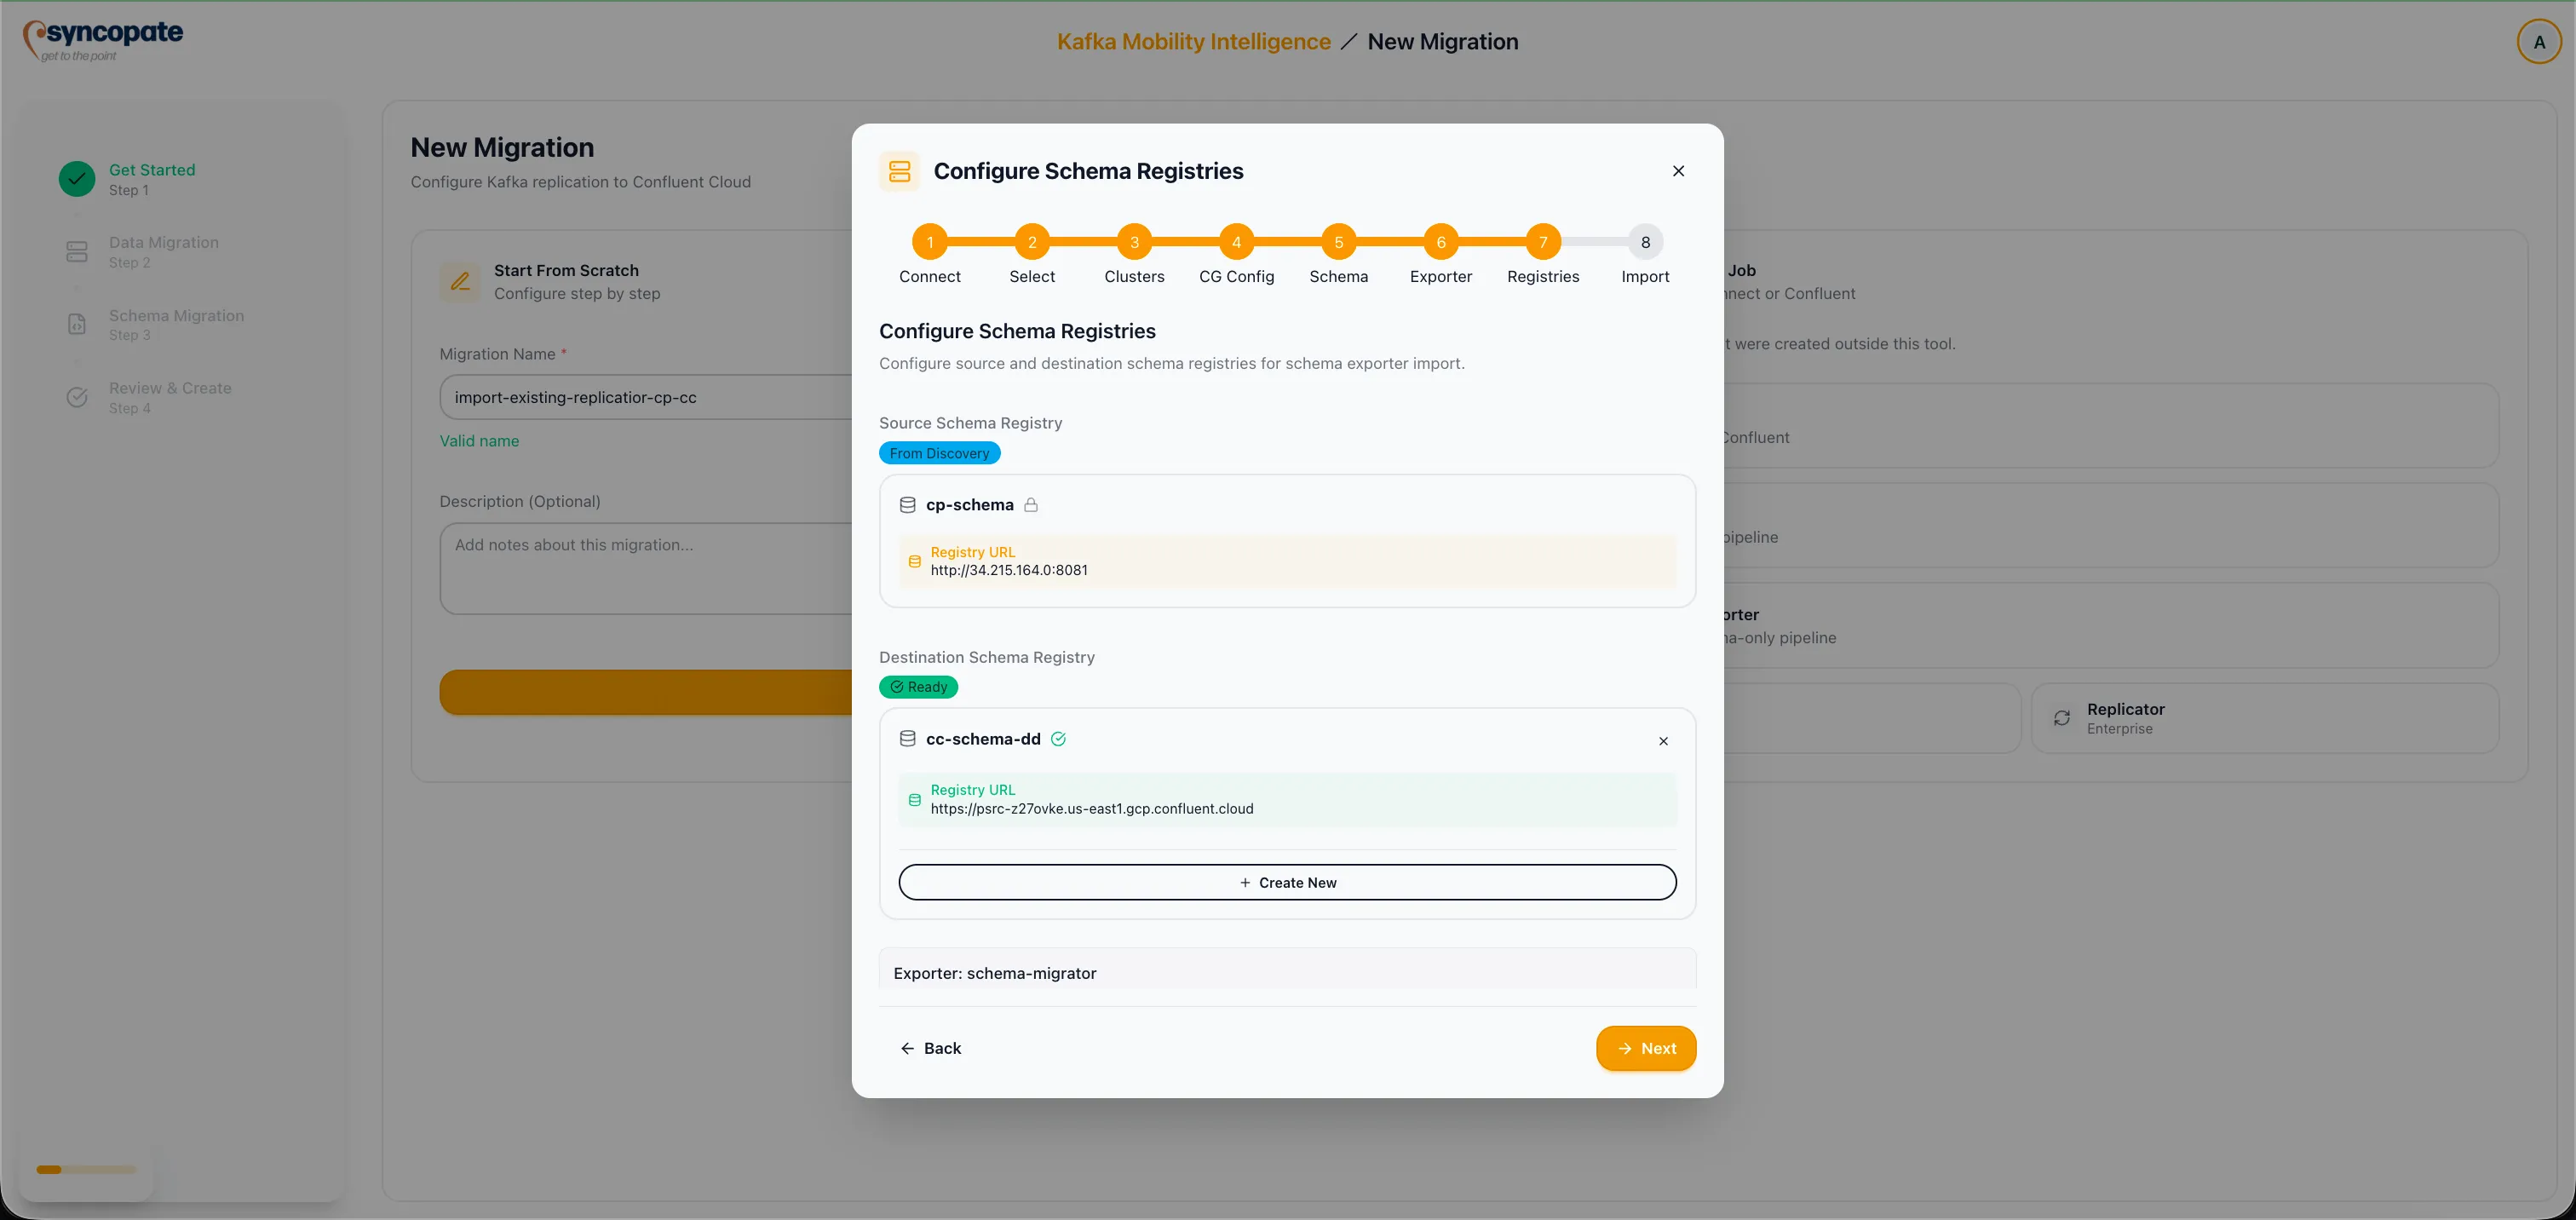
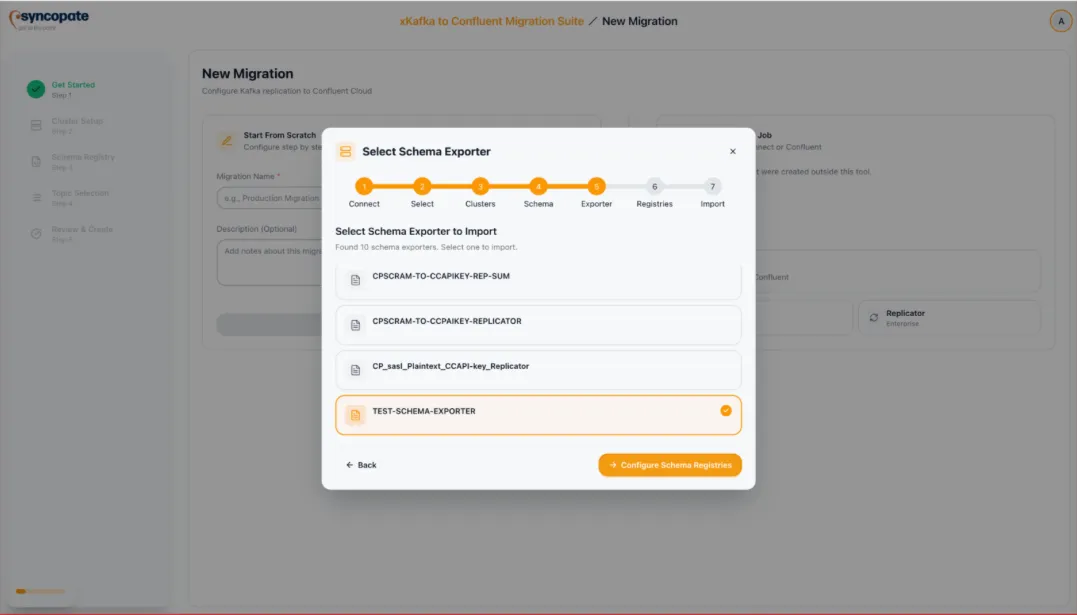
Optionally, import an existing Schema Exporter. Click Discover Exporters to list active exporters, select the appropriate exporter, and verify the source and destination schema registries. This follows the same flow as the MirrorMaker 2 import.
-
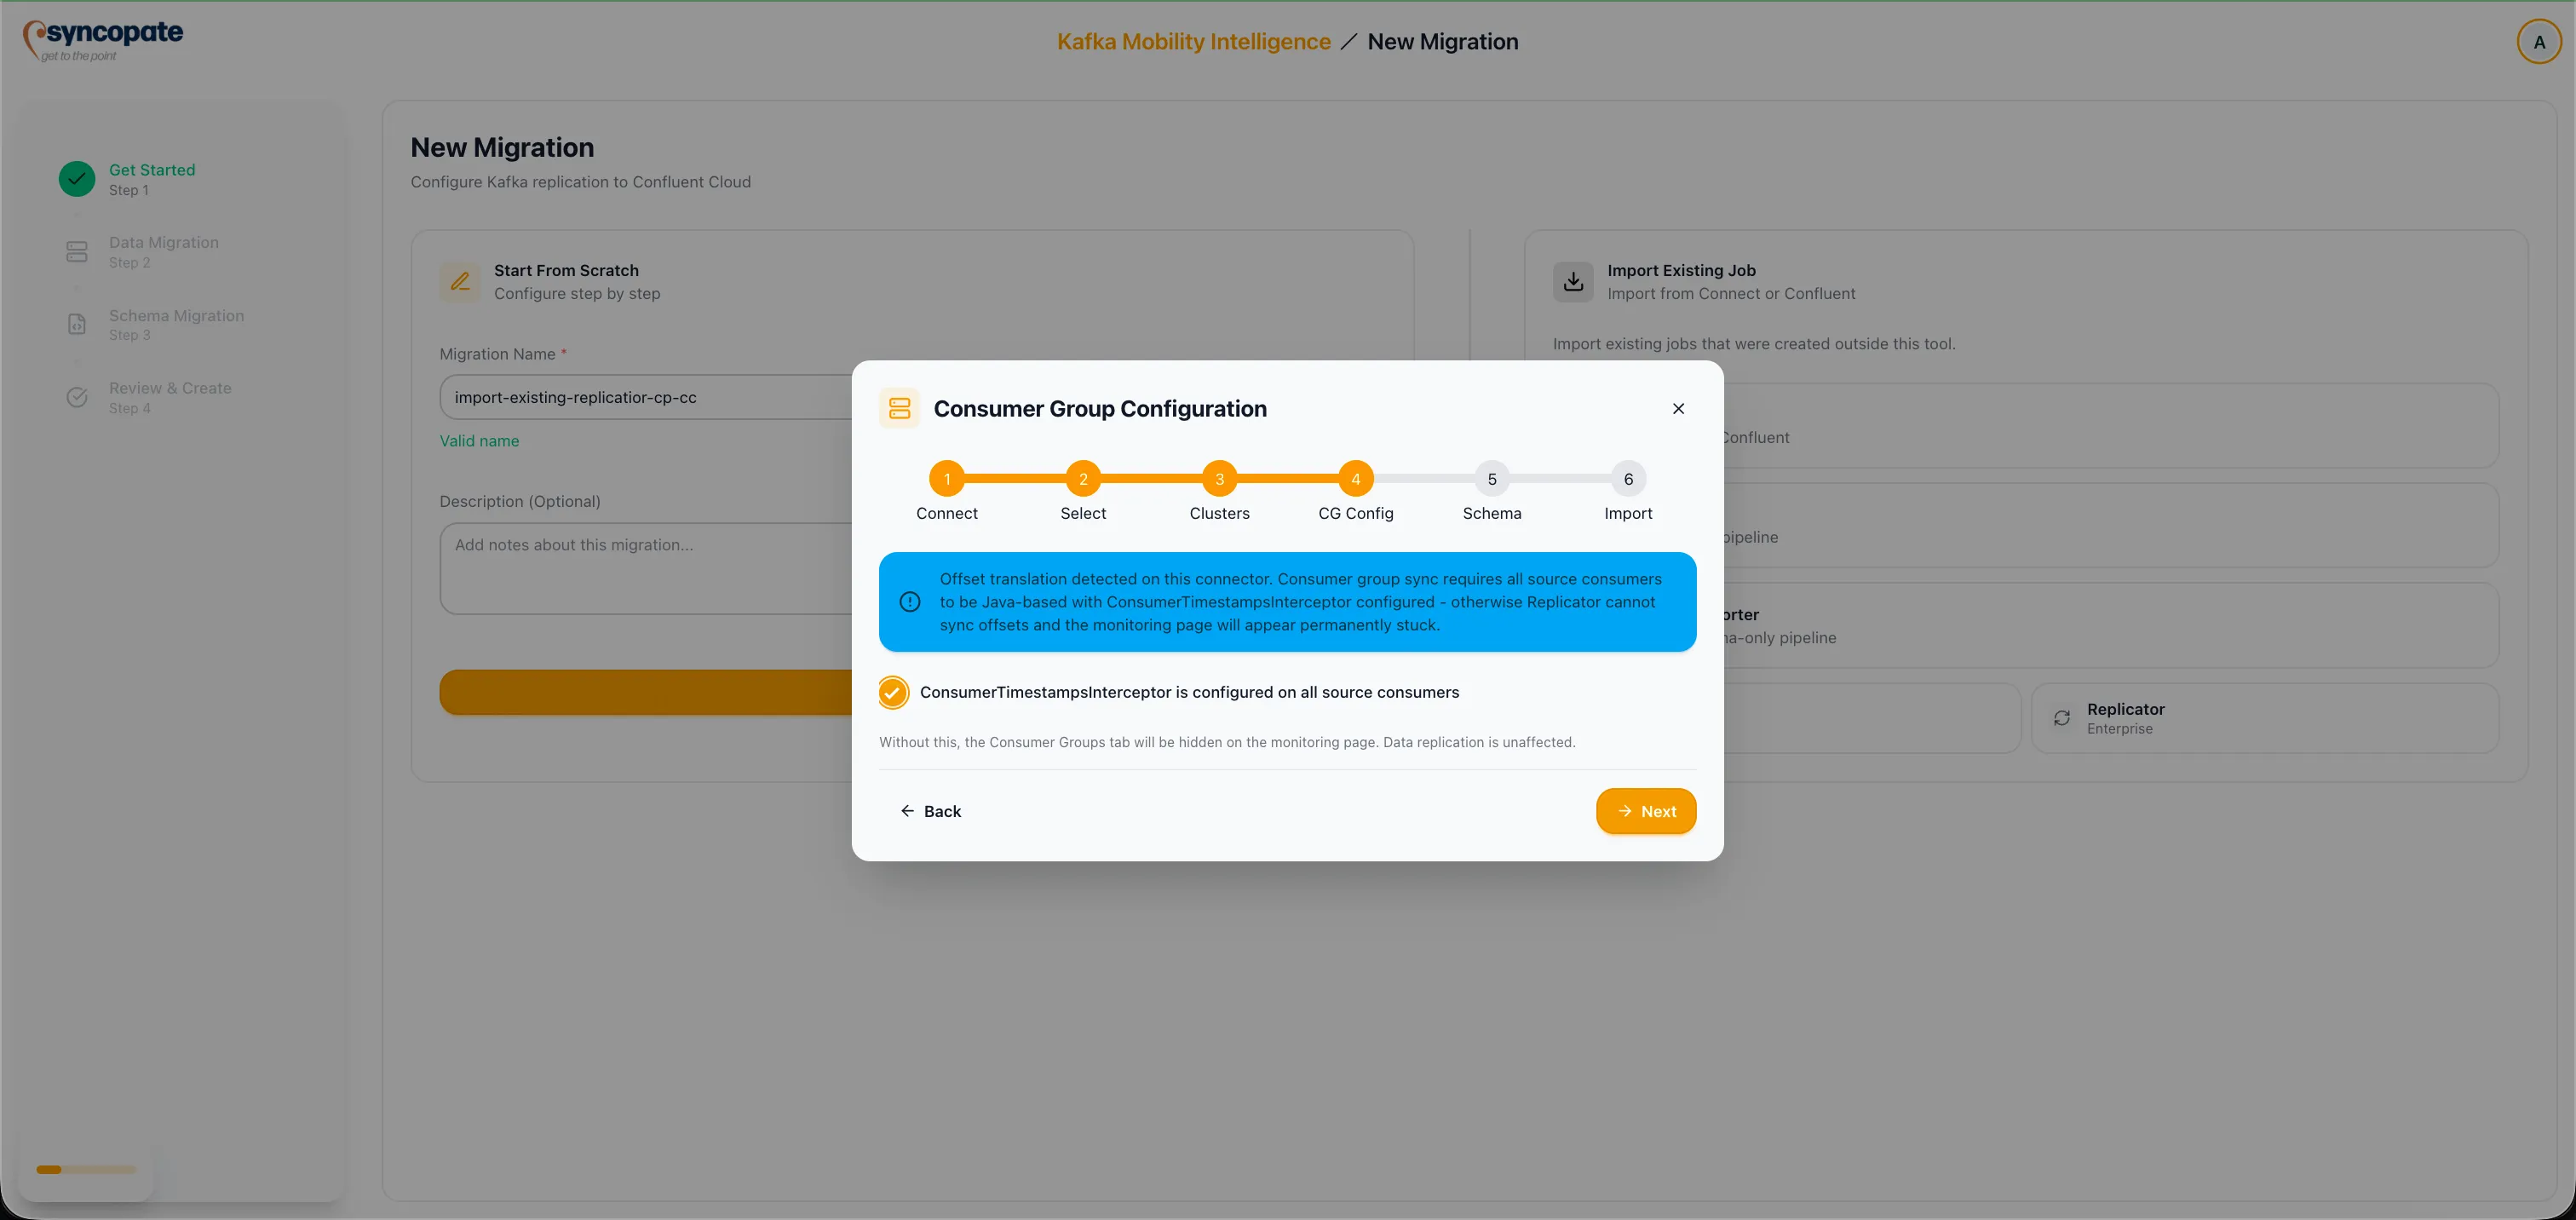
Configure consumer group replication options. Enable Offset Translation to translate consumer group offsets from the source format to the destination format, ensuring consumers resume from the correct position after cutover. Enable Consumer Timestamp Interceptor to use timestamp-based offset mapping, which provides more accurate offset translation when source and destination partition counts differ.
-
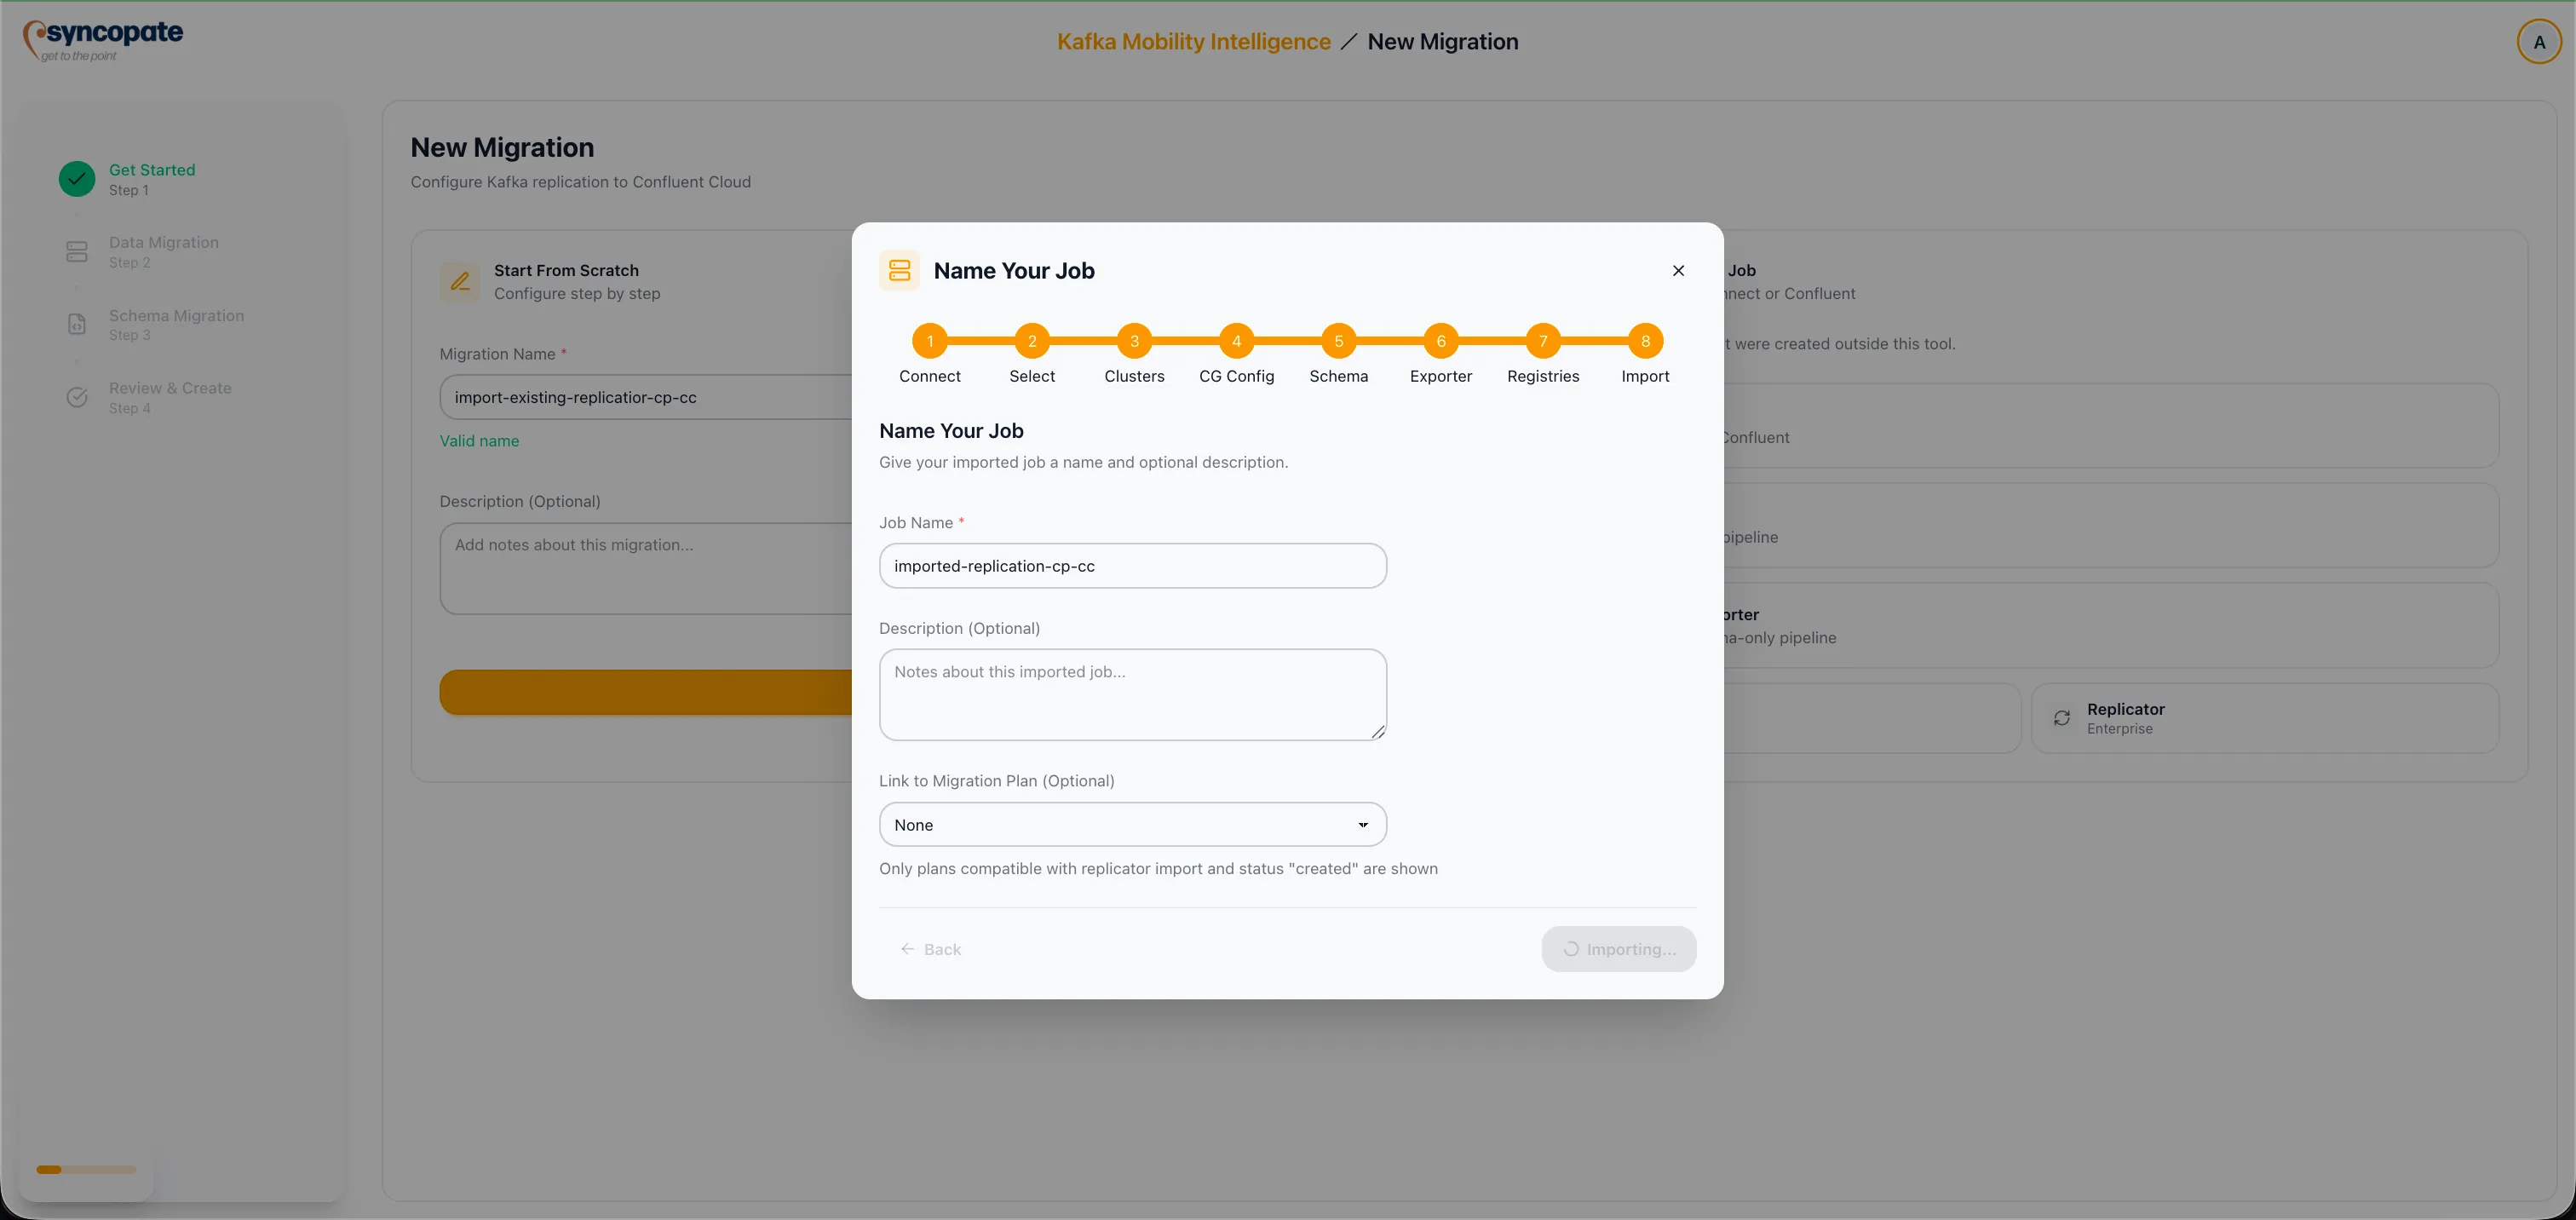
Enter a Job Name for the imported migration. Optionally select a Migration Plan to associate with the job.
-
Click Import and Start Monitoring to complete the import.
-
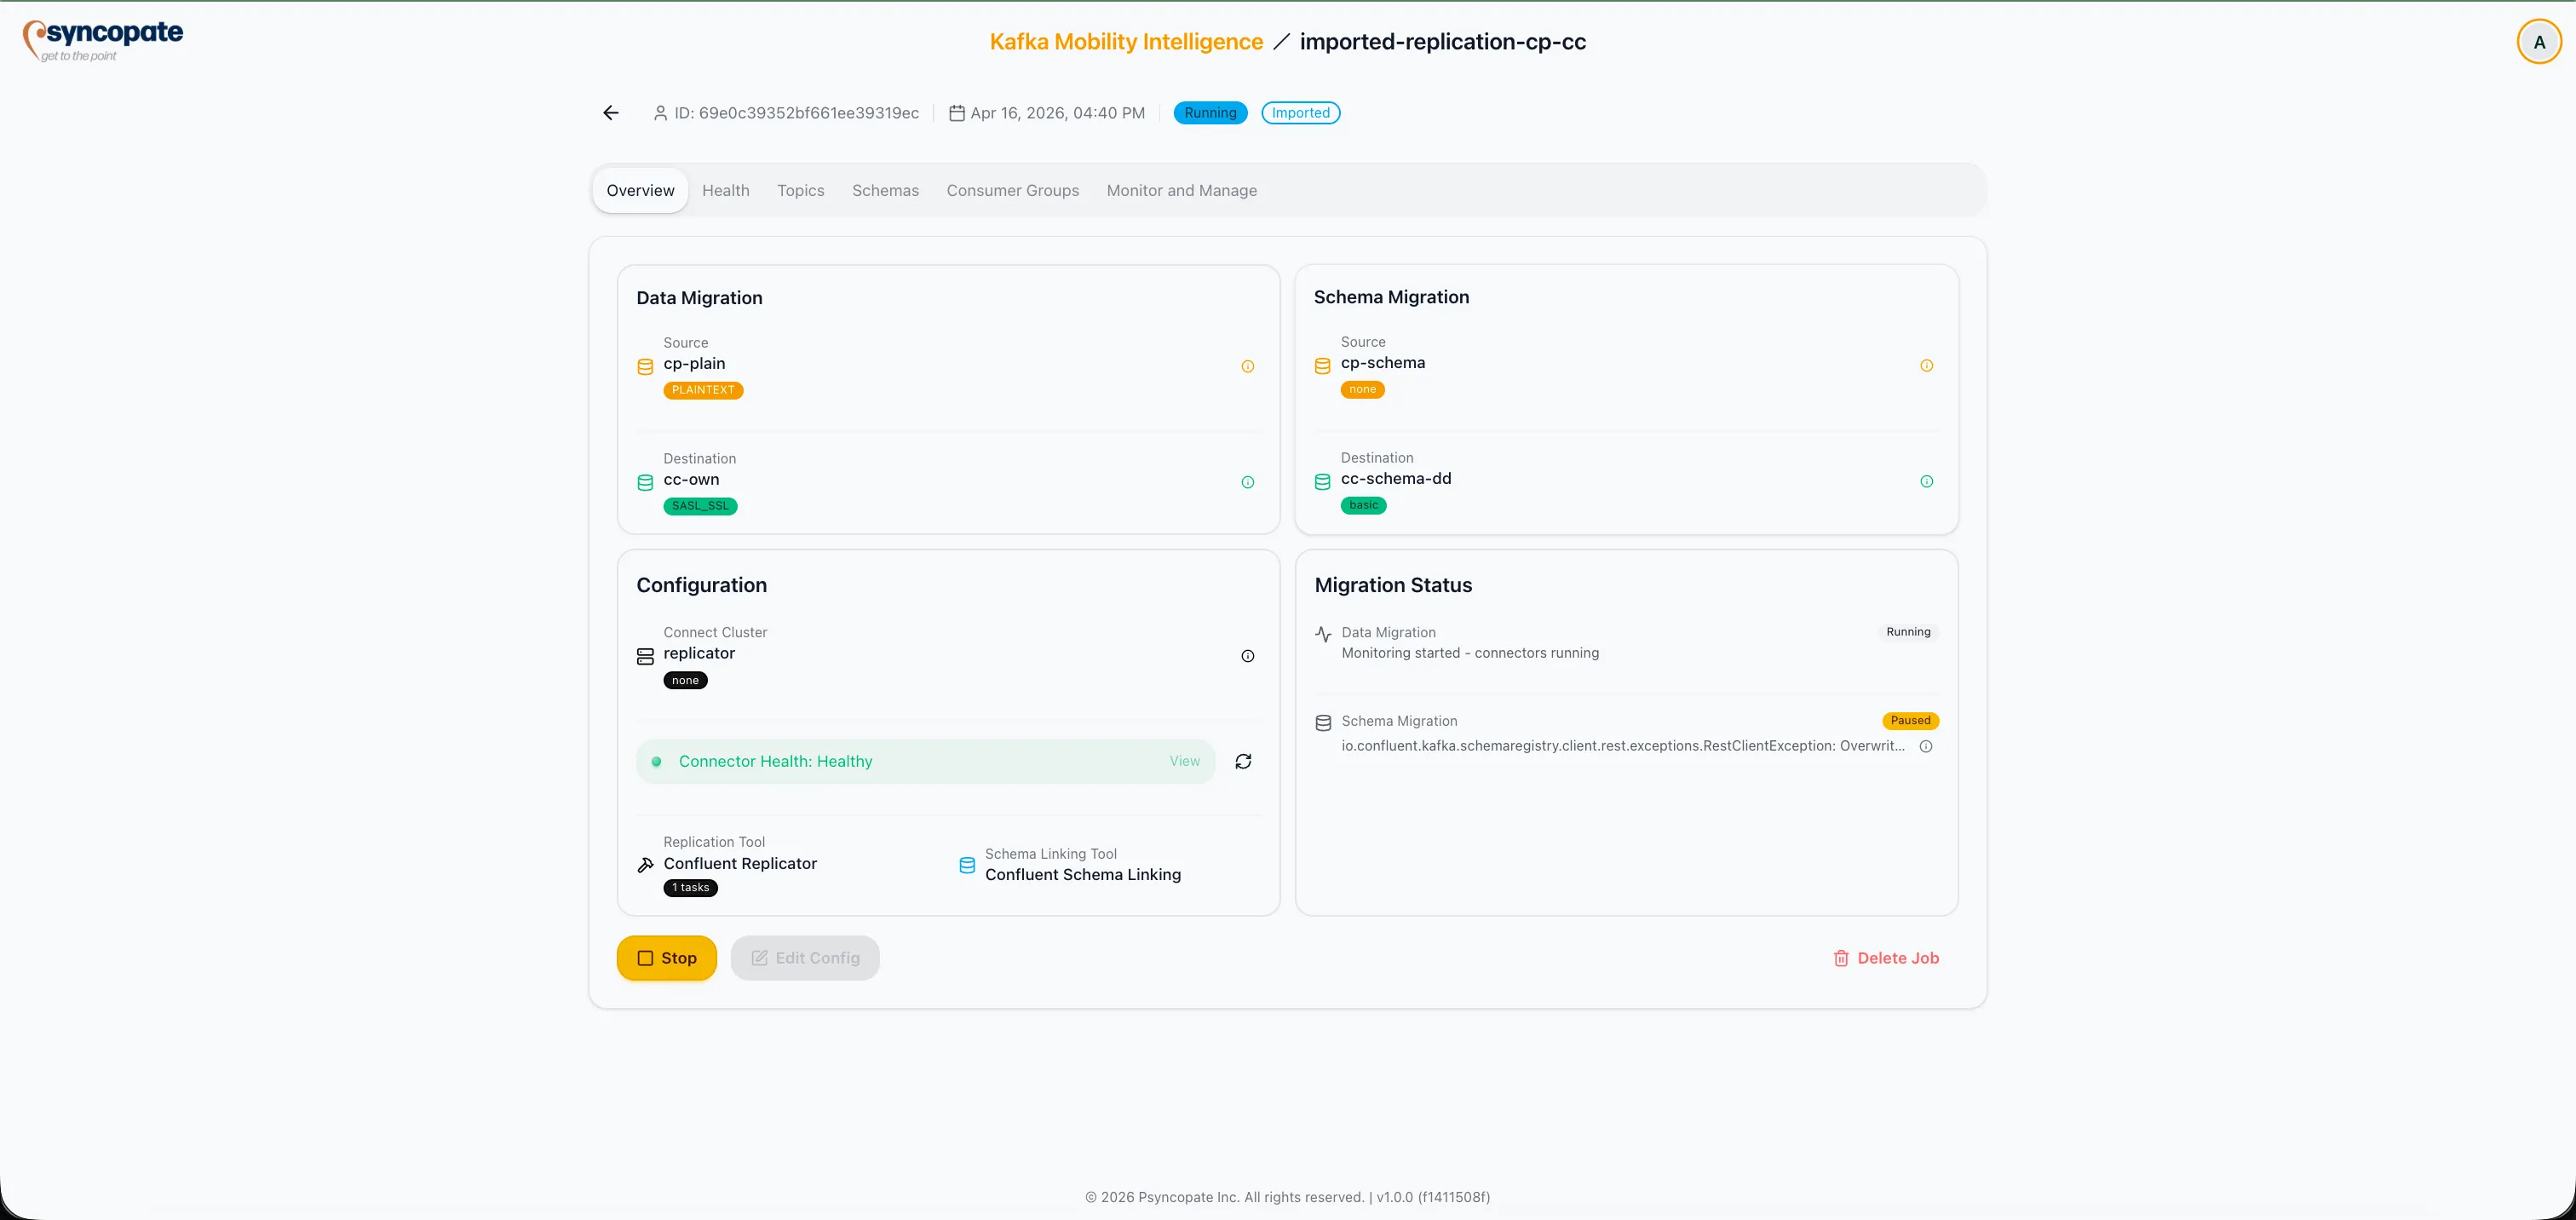
Click Start Monitoring to begin tracking the replication job.
-
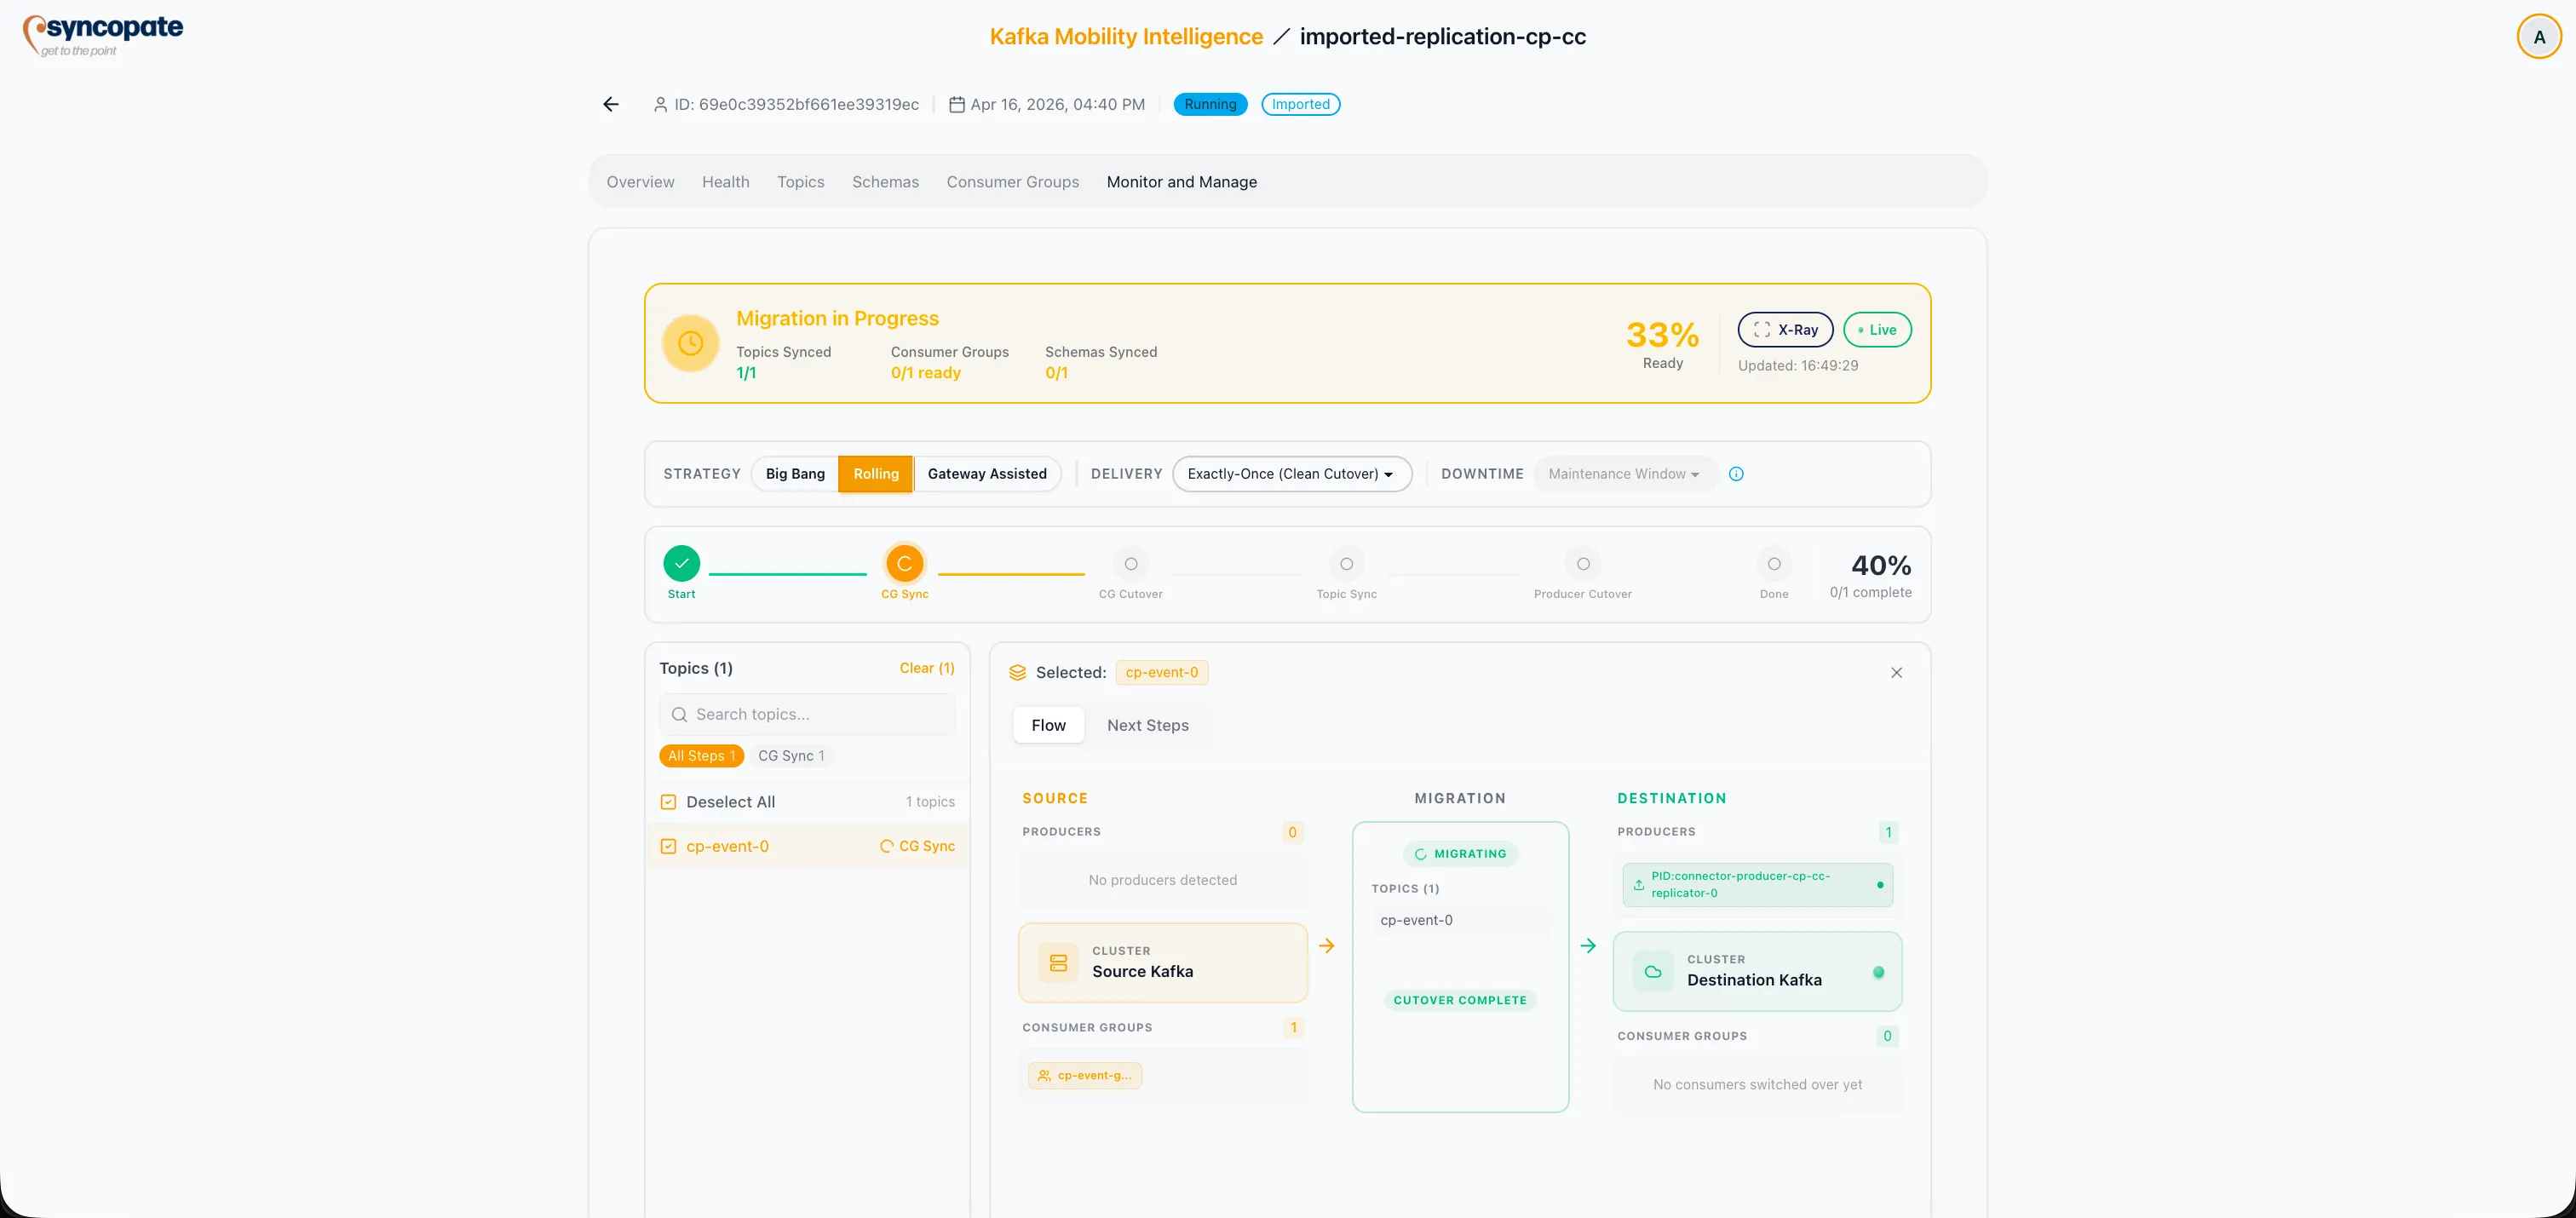
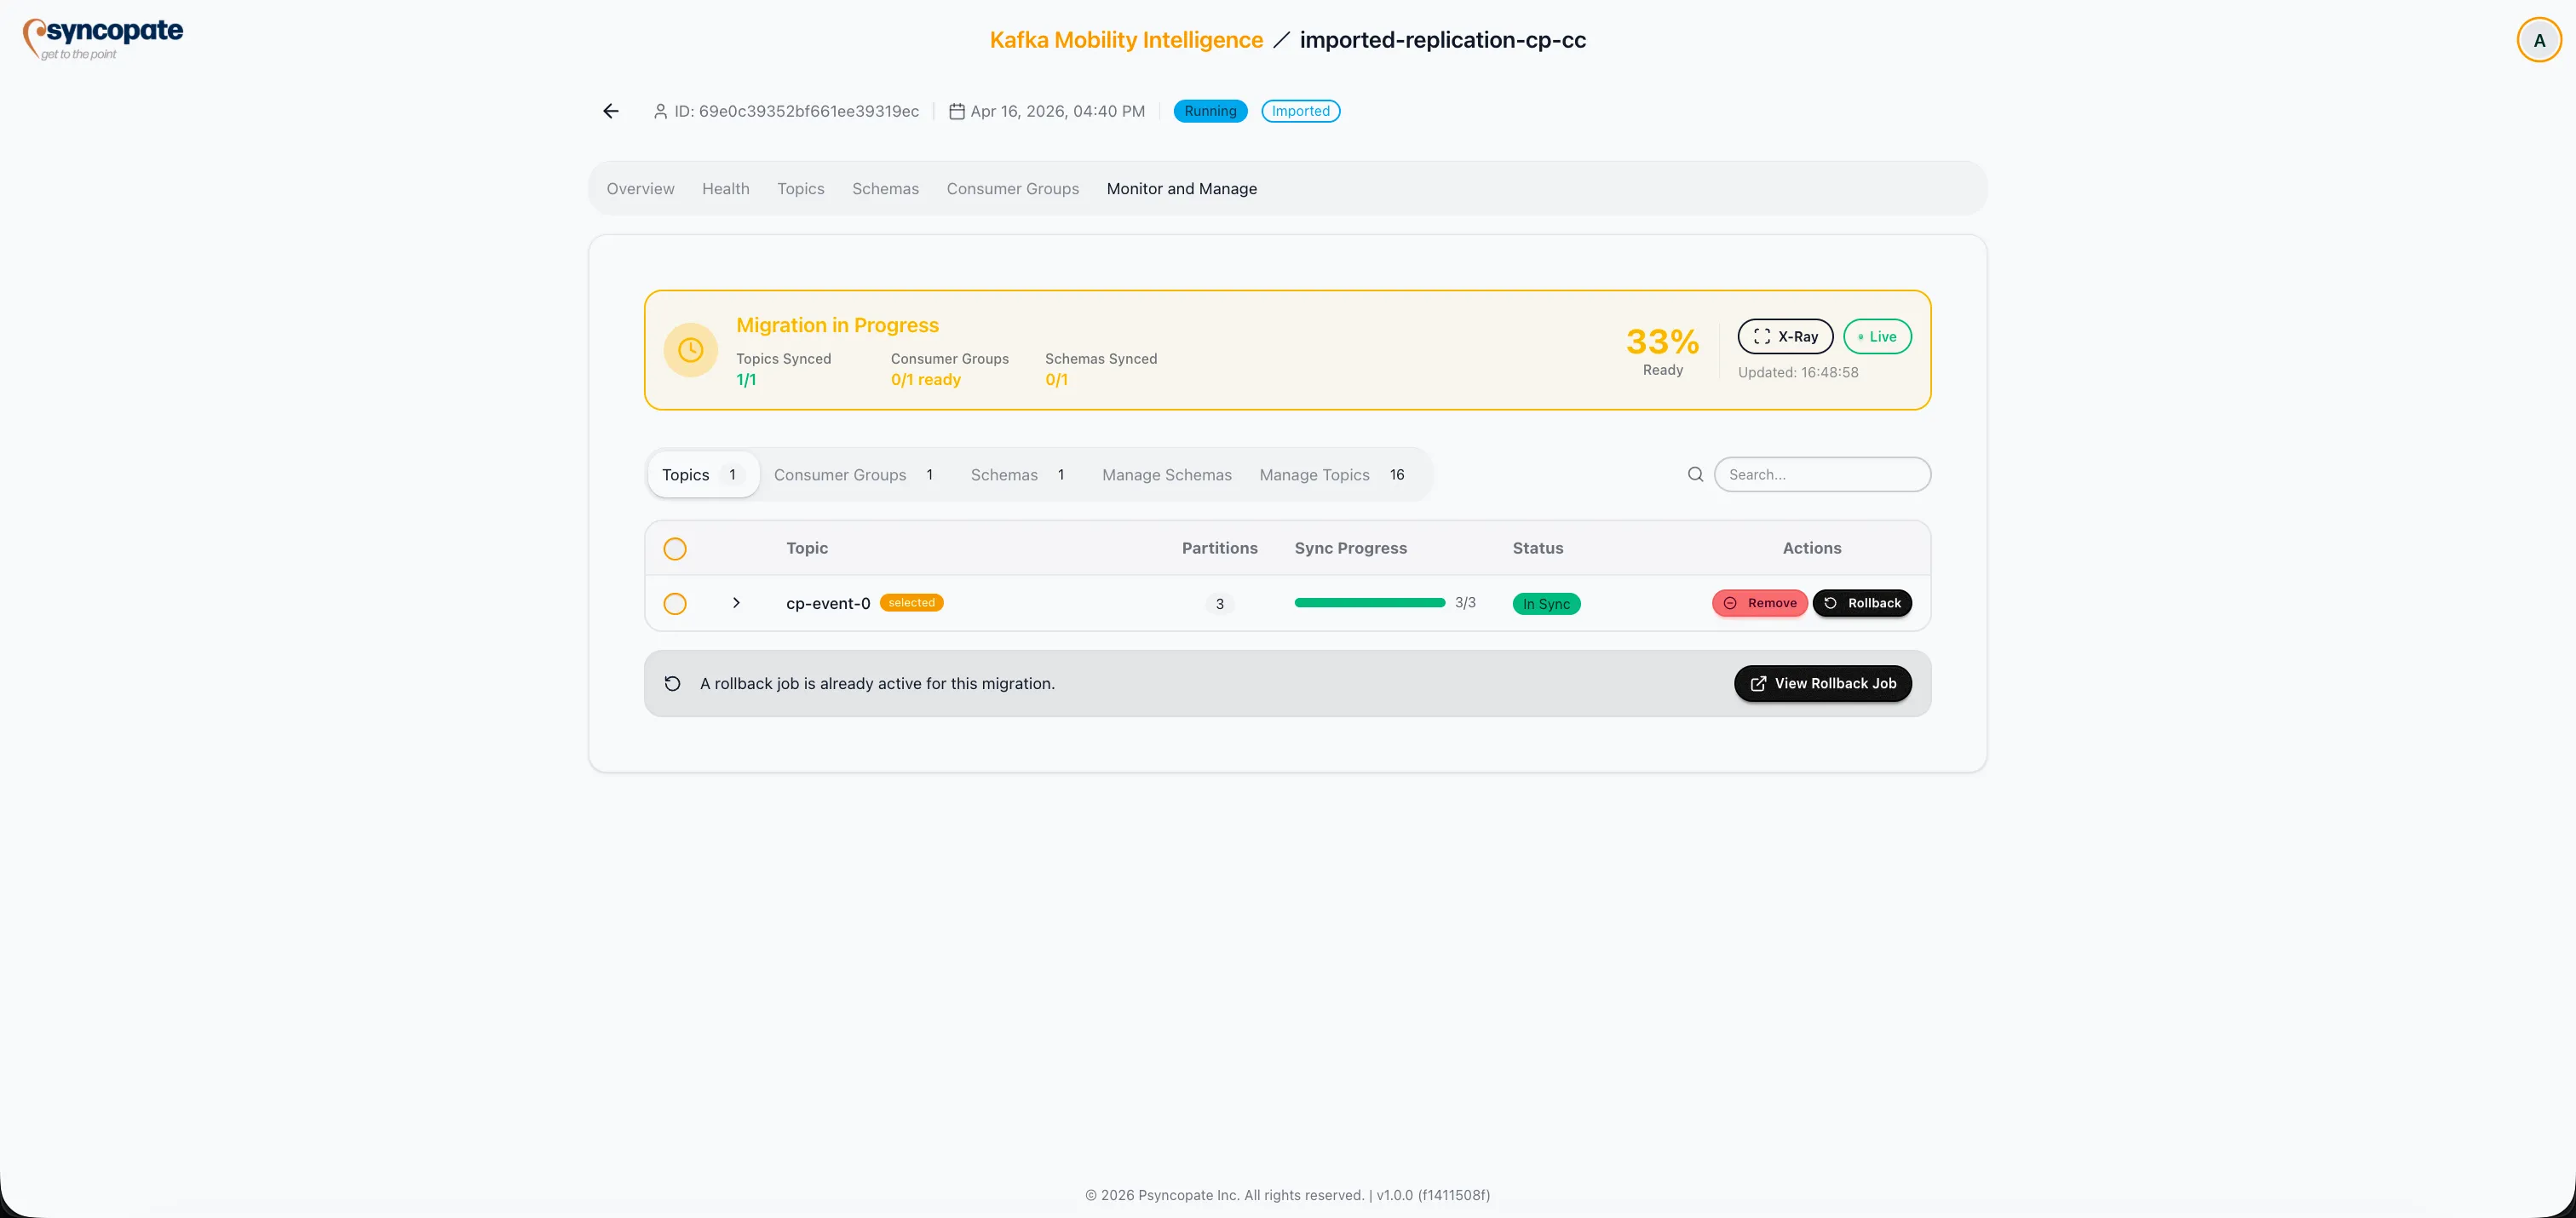
The job is now visible on the Dashboard. Use the Monitor tab to track replication progress in real time.