View a Migration Plan
When you open a migration plan from the Migration Plans tab on the Dashboard, the suite displays detailed guidance and outputs organized across several tabs. Each tab focuses on a different aspect of the migration.
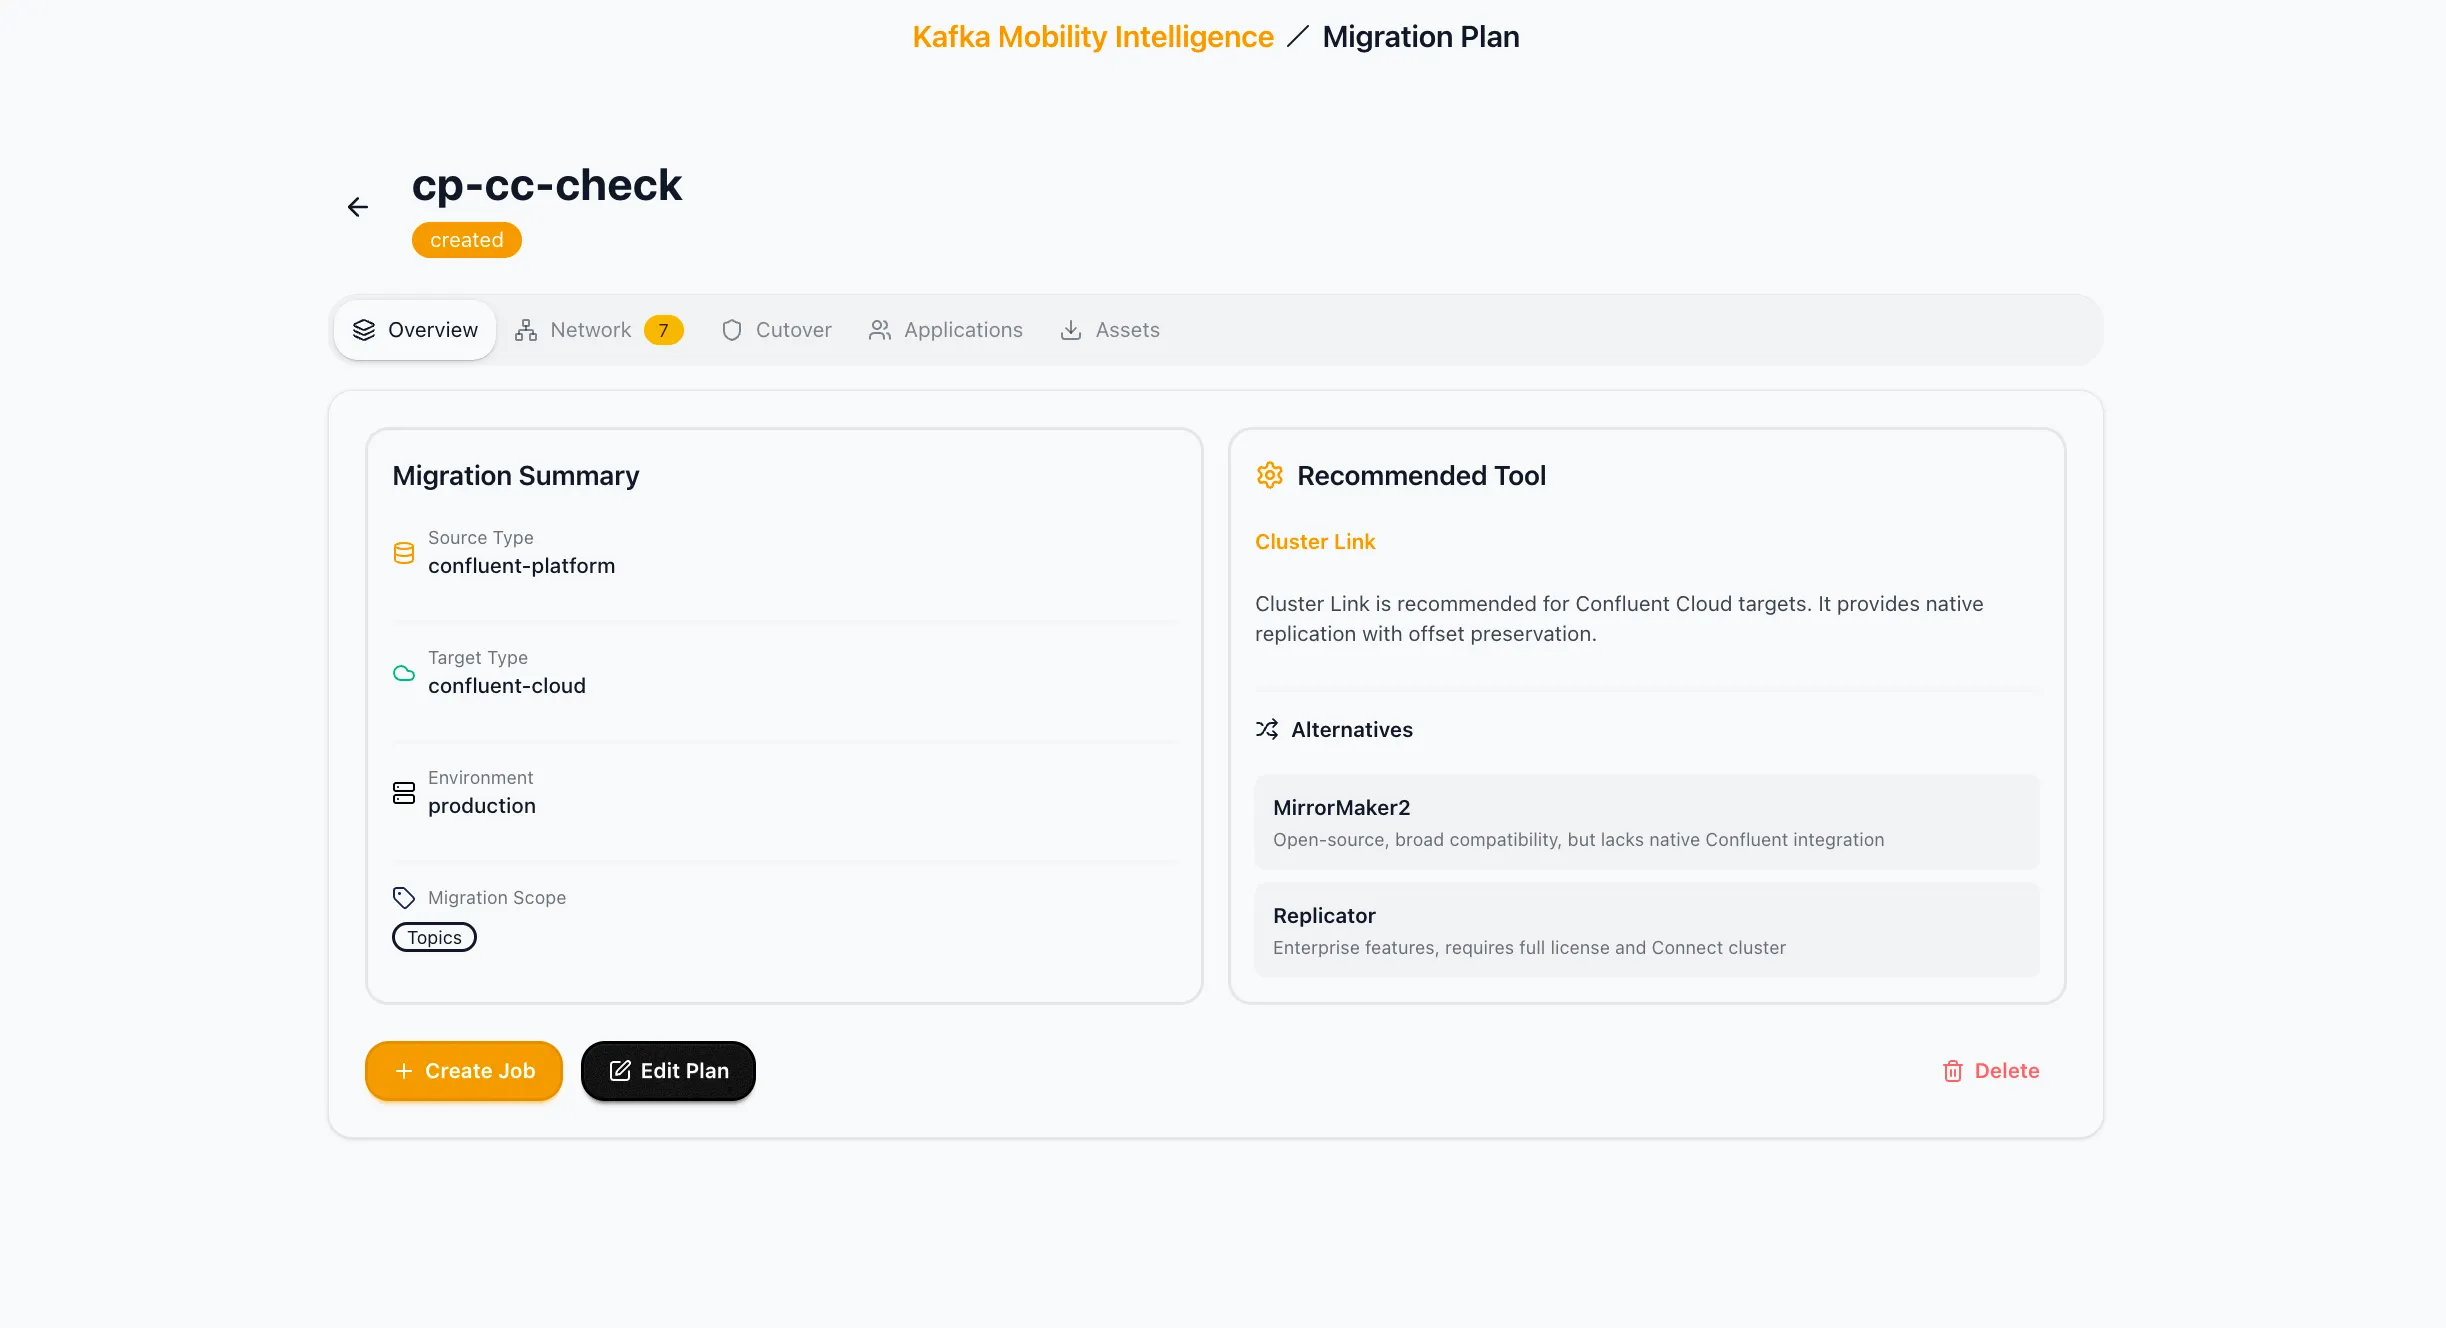
Overview Tab
Section titled “Overview Tab”The Overview tab provides a high-level summary of the plan.
Key information displayed:
- Source cluster type
- Target cluster type
- Environment type (Production or Non-Production)
- Migration scope summary
- Recommended migration tool
- Reason for the recommendation
- Alternative tools
- Key migration notes
Rollback characteristics: When the plan was created with a rollback requirement, the Overview tab includes a plain-language statement of each tool’s rollback capability:
| Tool | Rollback characteristic shown |
|---|---|
| MirrorMaker 2 | Supports reverse replication back to the source cluster |
| Replicator | Supports reverse replication back to the source cluster |
| Cluster Link (Confluent ↔ Confluent) | Rollback possible only while both ends remain Confluent clusters |
| Cluster Link (non-Confluent source, rollback required) | Excluded from recommendation and alternatives; rationale explains that a cluster link destination must be Confluent |
| WarpStream Orbit | Promotion is irreversible; no rollback after promotion |
When schema migration is part of the plan, the Overview tab also states that schema migration has no reverse path.
From this tab, you can initiate job creation directly by clicking Create Migration Job.
Gateway Tab
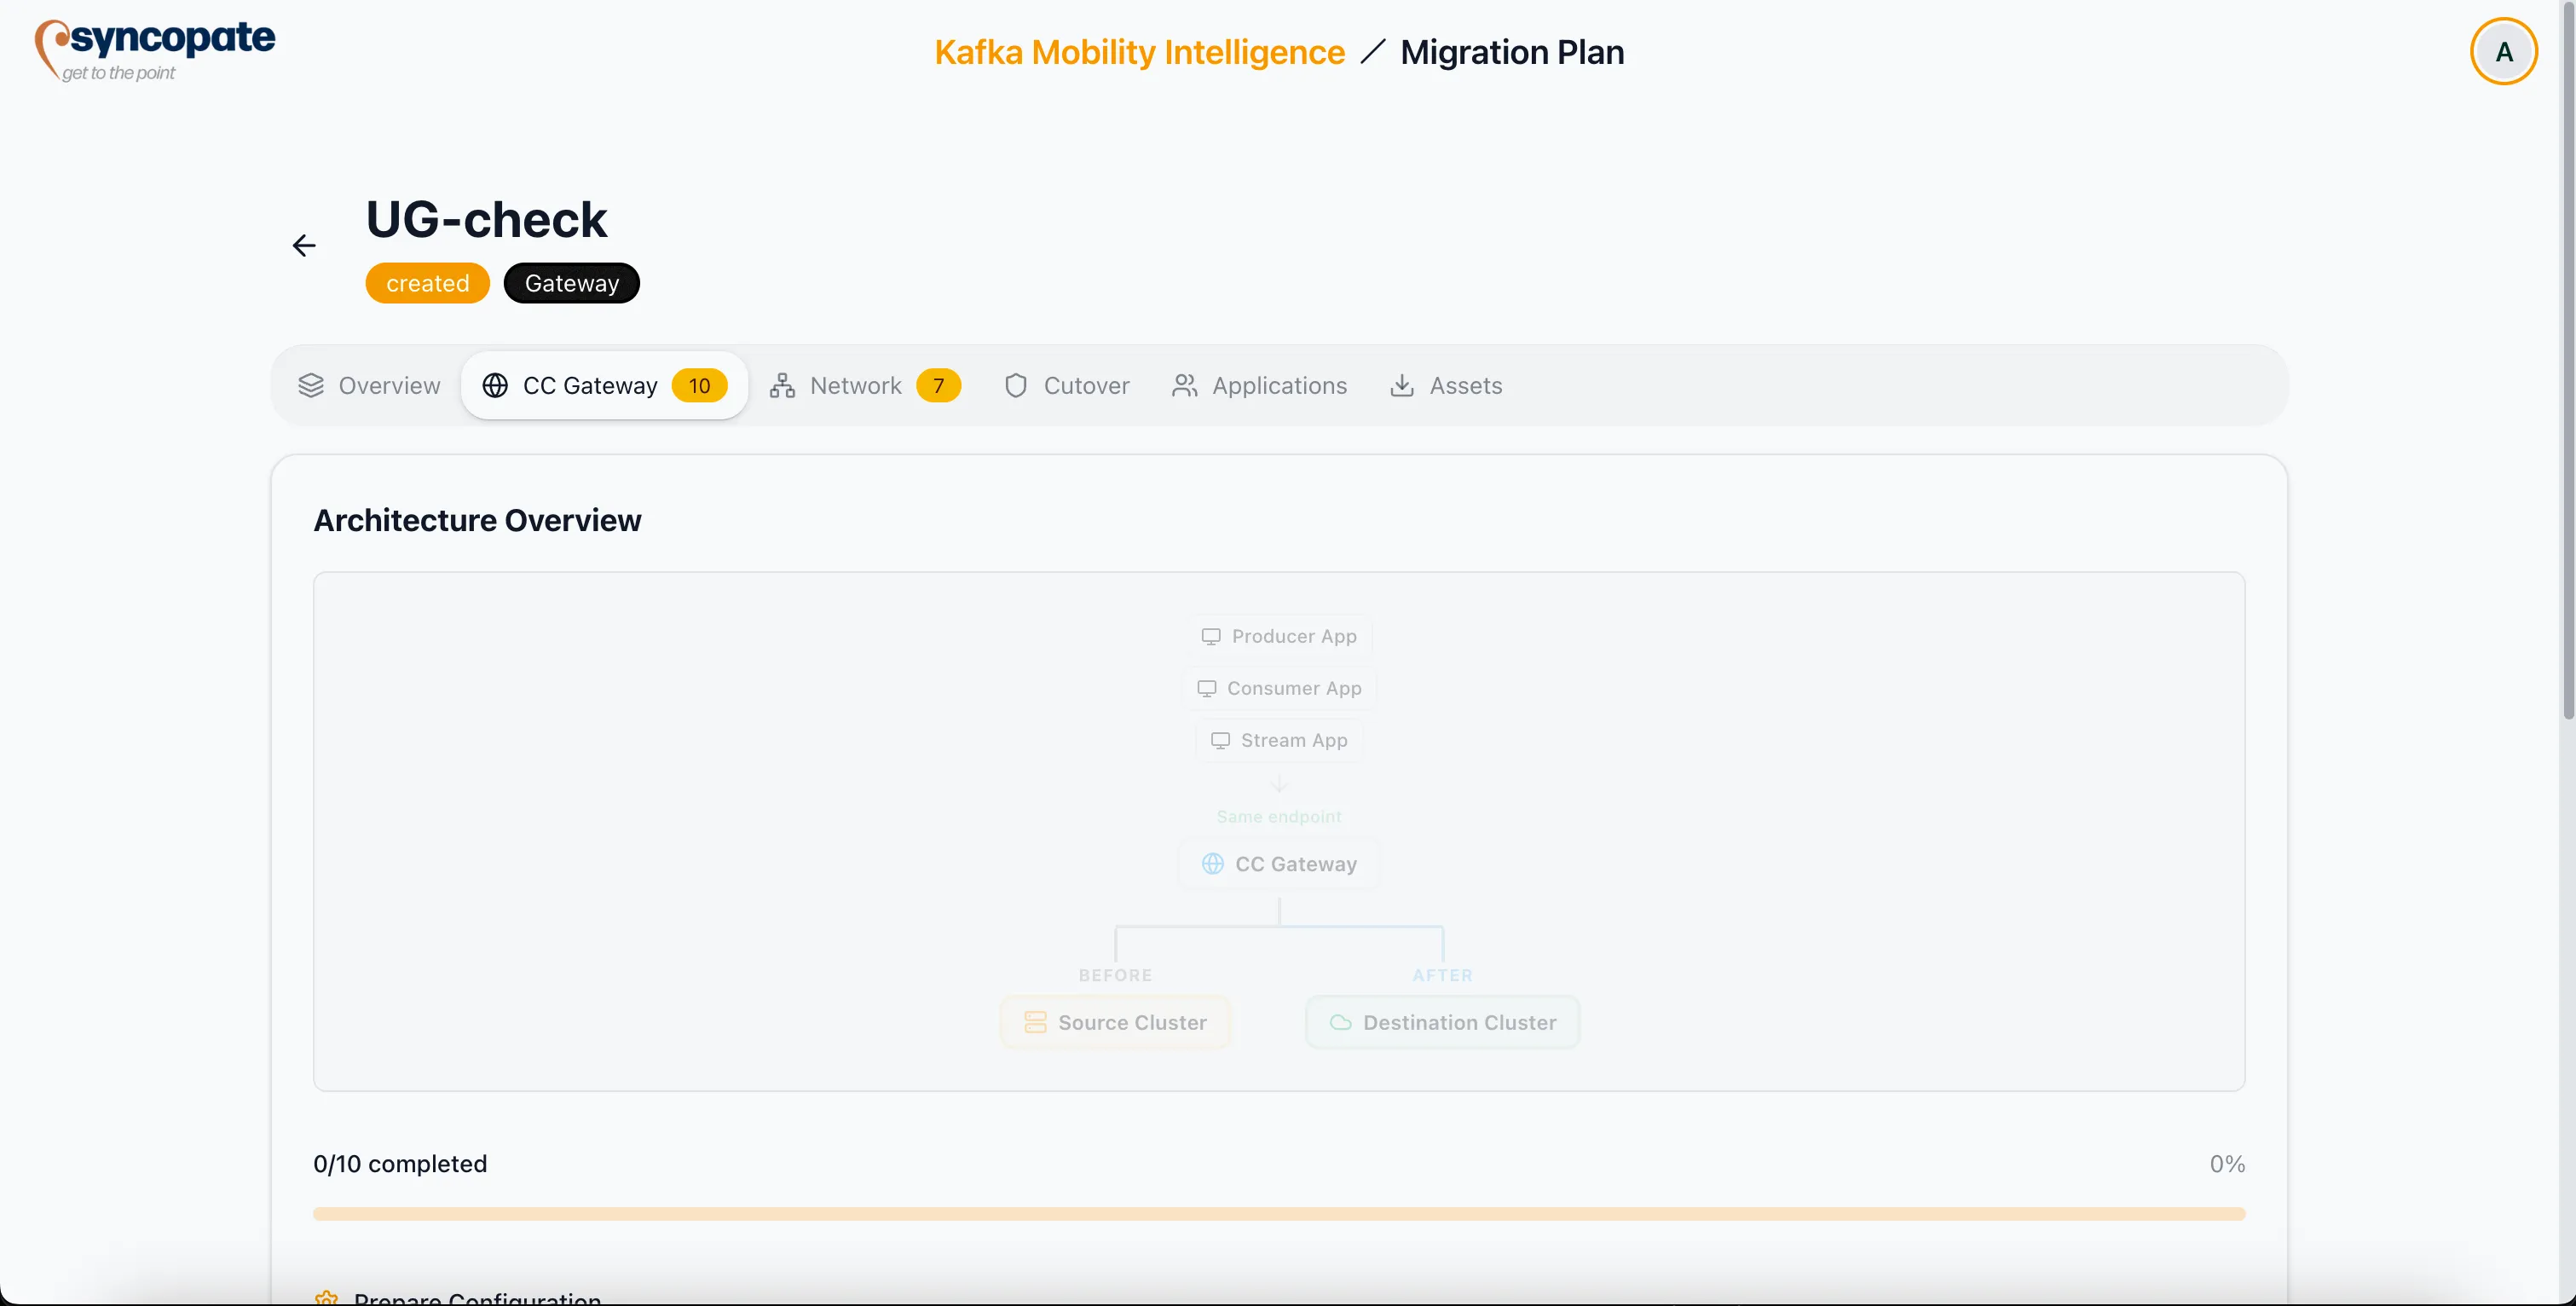
Section titled “Gateway Tab”The Gateway tab presents an architecture overview diagram and a checklist-driven implementation plan for deploying the gateway. Above the diagram, a Selected gateway card names the gateway resource this plan uses, with its namespace and a link into the builder.
The diagram itself is fixed. The only text that varies in it is the gateway node’s label, which follows the destination type rather than the gateway you picked, so it reads “CC Gateway” or “CPC Gateway”. As you work through the checklist, the diagram lights up its gateway, connection, and application elements stage by stage.
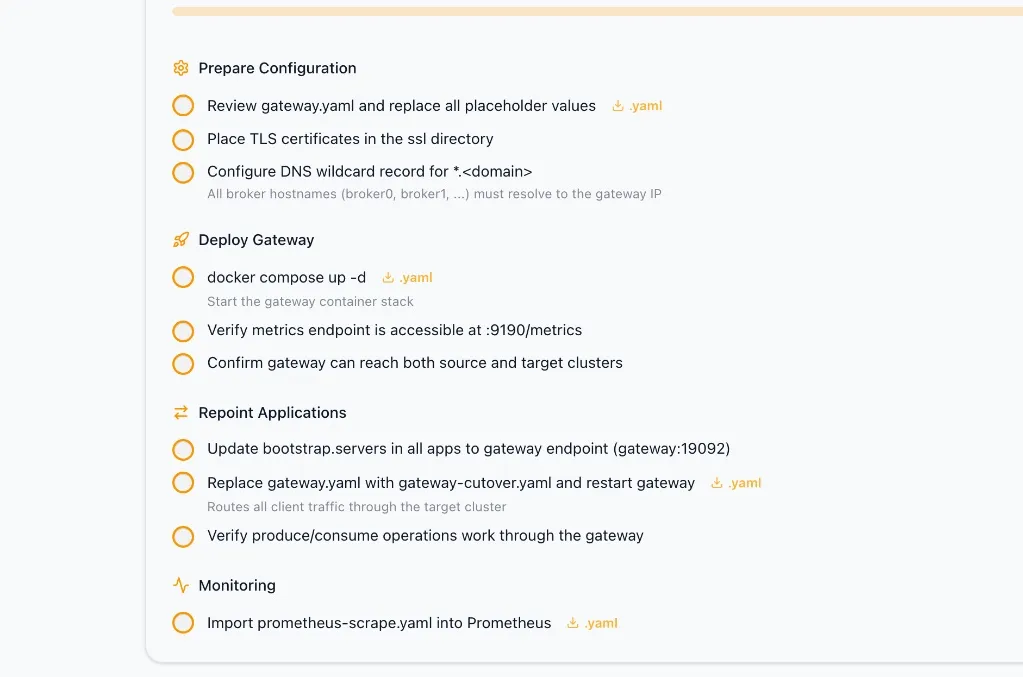
The checklist is generated from the gateway resource selected in the plan wizard, so its contents vary with that gateway’s authentication mode and broker identification strategy.
Deployment Workflow
Section titled “Deployment Workflow”-
Prepare Configuration
- Review
gateway.yamland replace all placeholder values. - Place TLS certificates in the
ssldirectory. - On a swapping gateway only: configure the JAAS files with client and broker credentials,
jaas-config.conffor client auth andjaas-template.conffor broker auth. - On a host/SNI gateway only: configure a DNS wildcard record for the gateway’s domain, so every broker hostname resolves to the gateway IP.
- Review
-
Deploy Gateway
- Run
kubectl apply -f kubernetes-deployment.yaml. - Verify the metrics endpoint is reachable at
:9190/metrics. - Confirm the gateway can reach both the source and the target cluster.
- Run
-
Repoint Applications
- Update
bootstrap.serversin every application to the gateway endpoint, which the item names inline: the gateway’s own domain on port 19092 for a host/SNI gateway, otherwisegateway:19092. - Replace
gateway.yamlwithgateway-cutover.yamland restart the gateway, which routes client traffic through the target cluster. - Verify produce and consume operations work through the gateway.
- Update
-
Monitoring
- Import
prometheus-scrape.yamlinto Prometheus.
- Import
An MSK-to-Confluent-Cloud plan that opted into the automated migration path shows a different checklist here: reviewing the three gateway CRs, applying the initial one, then running the migration initialize and execute stages. On that path the diagram does not track progress. Its stages don’t correspond to the ones the diagram watches, so it renders fully lit from the moment the tab opens and tells you nothing about how far along you are.
Network Tab
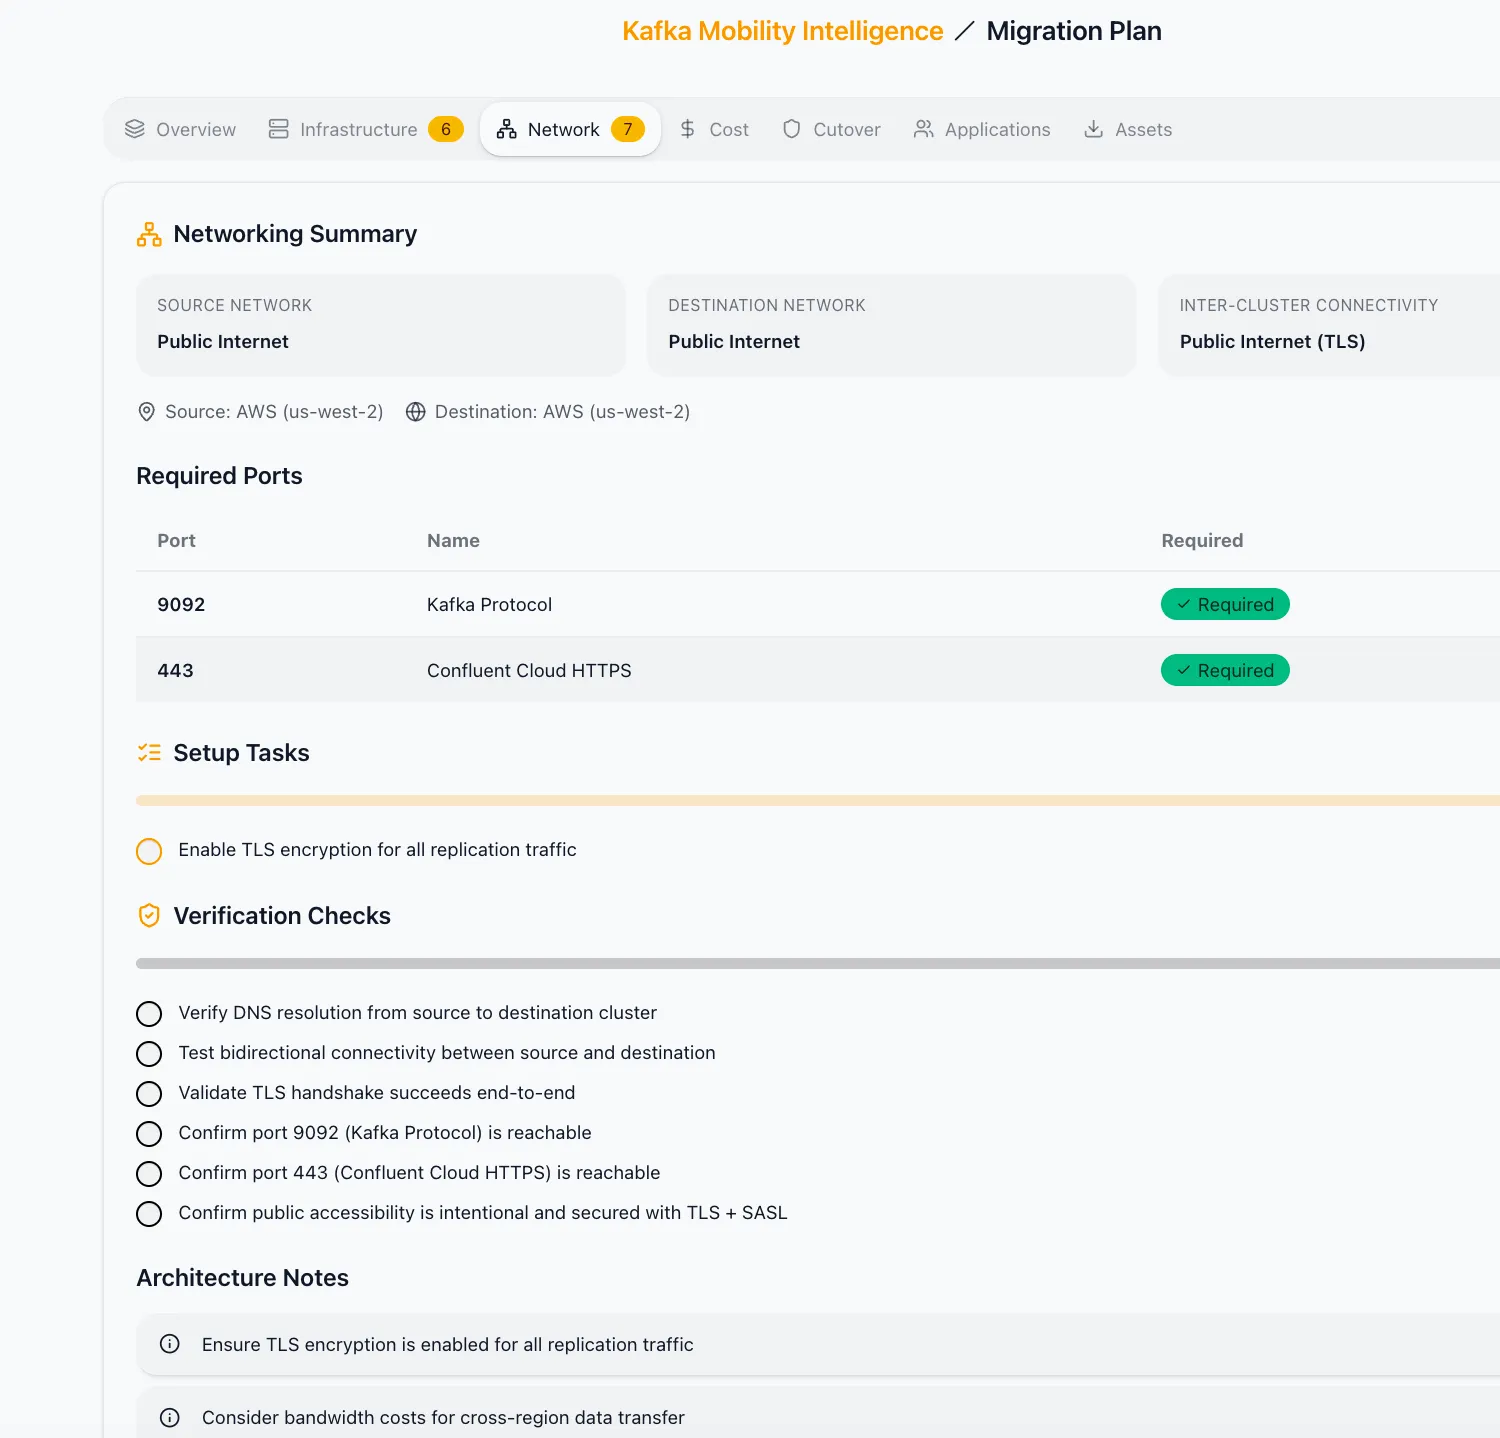
Section titled “Network Tab”The Network tab consolidates all networking details relevant to the migration.
Networking Summary
Section titled “Networking Summary”| Field | Description |
|---|---|
| Source | Network type, region, and access configuration for the source cluster |
| Destination | Network type, region, and access configuration for the destination cluster |
| Trust Boundary | How traffic crosses between source and destination networks |
| Security Protocols | Encryption and authentication mechanisms in use |
Required Ports
Section titled “Required Ports”| Category | Purpose |
|---|---|
| Data | Ports used for Kafka broker communication and data replication |
| Management | Ports for administrative APIs and cluster management |
| Monitoring | Ports for metrics collection and health checks |
Setup Tasks
Section titled “Setup Tasks”- Provision and install TLS certificates.
- Configure load balancers for gateway or broker endpoints.
- Enable encryption in transit for all data paths.
Verification Checks
Section titled “Verification Checks”- DNS resolution from all relevant hosts.
- Bidirectional network reachability between source, destination, and gateway.
- Successful TLS handshake confirmation.
Connectivity Warnings
Section titled “Connectivity Warnings”The suite surfaces warnings for conditions that may affect the migration:
- Bandwidth and egress cost implications for cross-cloud or cross-region traffic.
- Latency concerns that could impact replication lag or consumer group synchronization.
Cutover Tab
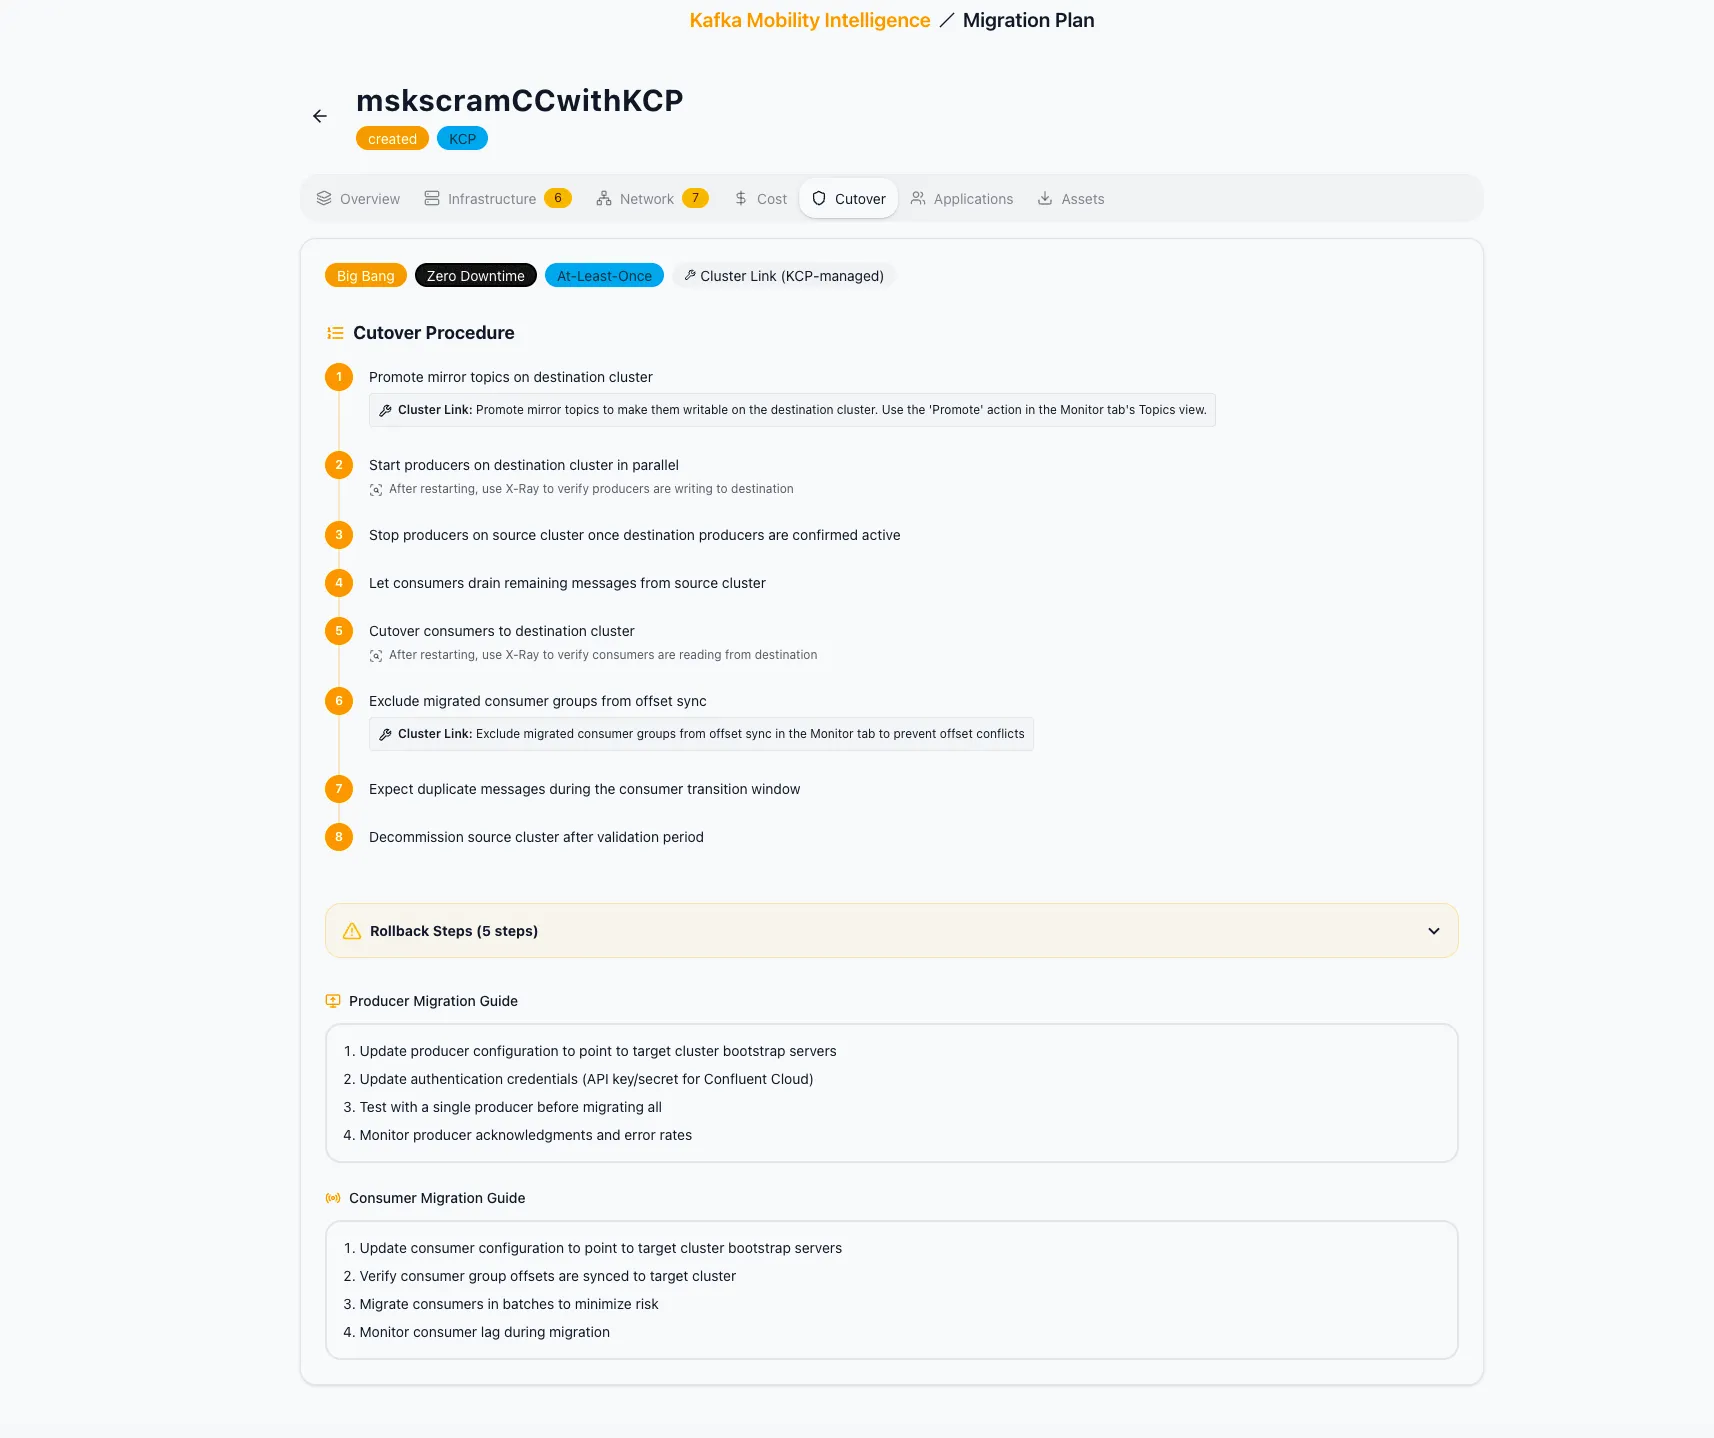
Section titled “Cutover Tab”The Cutover tab provides a detailed migration strategy tailored to your plan inputs. For Gateway-Assisted migrations, this tab emphasizes zero-downtime procedures with at-least-once delivery guarantees.
Core Procedure
Section titled “Core Procedure”-
Route Redirection: The gateway instantly redirects traffic from the source cluster to the destination cluster. No application restarts are required.
-
Integrity Management: Prepare for potential duplicate messages during the transition window. Implement application-side idempotency where strict deduplication is required.
-
Decommissioning: After validation confirms that all workloads are running against the destination cluster, retire the source cluster.
Specialized Guides
Section titled “Specialized Guides”When using Gateway-Assisted migration, producers and consumers do not need connection string changes. The gateway transparently routes traffic to the active cluster.
Export existing connector configurations from the source Connect cluster. Redeploy connectors against the destination cluster or through the gateway, depending on your deployment model.
Rollback Steps
Section titled “Rollback Steps”The Cutover tab always includes a Rollback Steps section. Its contents depend on the recommended tool and topology.
When the tool supports rollback (MM2, Replicator, or Cluster Link between Confluent clusters):
-
Redirect the gateway back to the source cluster (gateway-assisted) or reconfigure applications to point to the source (standard migration).
-
Verify that all producers and consumers have reconnected to the source.
-
Validate message integrity and consumer group offsets on the source cluster. The rollback steps carry the same X-Ray monitoring guidance as the forward cutover steps.
-
Investigate the root cause before reattempting cutover.
When rollback is not available for the topology (Cluster Link with a non-Confluent source, or WarpStream Orbit after promotion):
The section shows a notice stating that rollback is not available for this topology and explaining why, instead of rollback steps.
Applications Tab
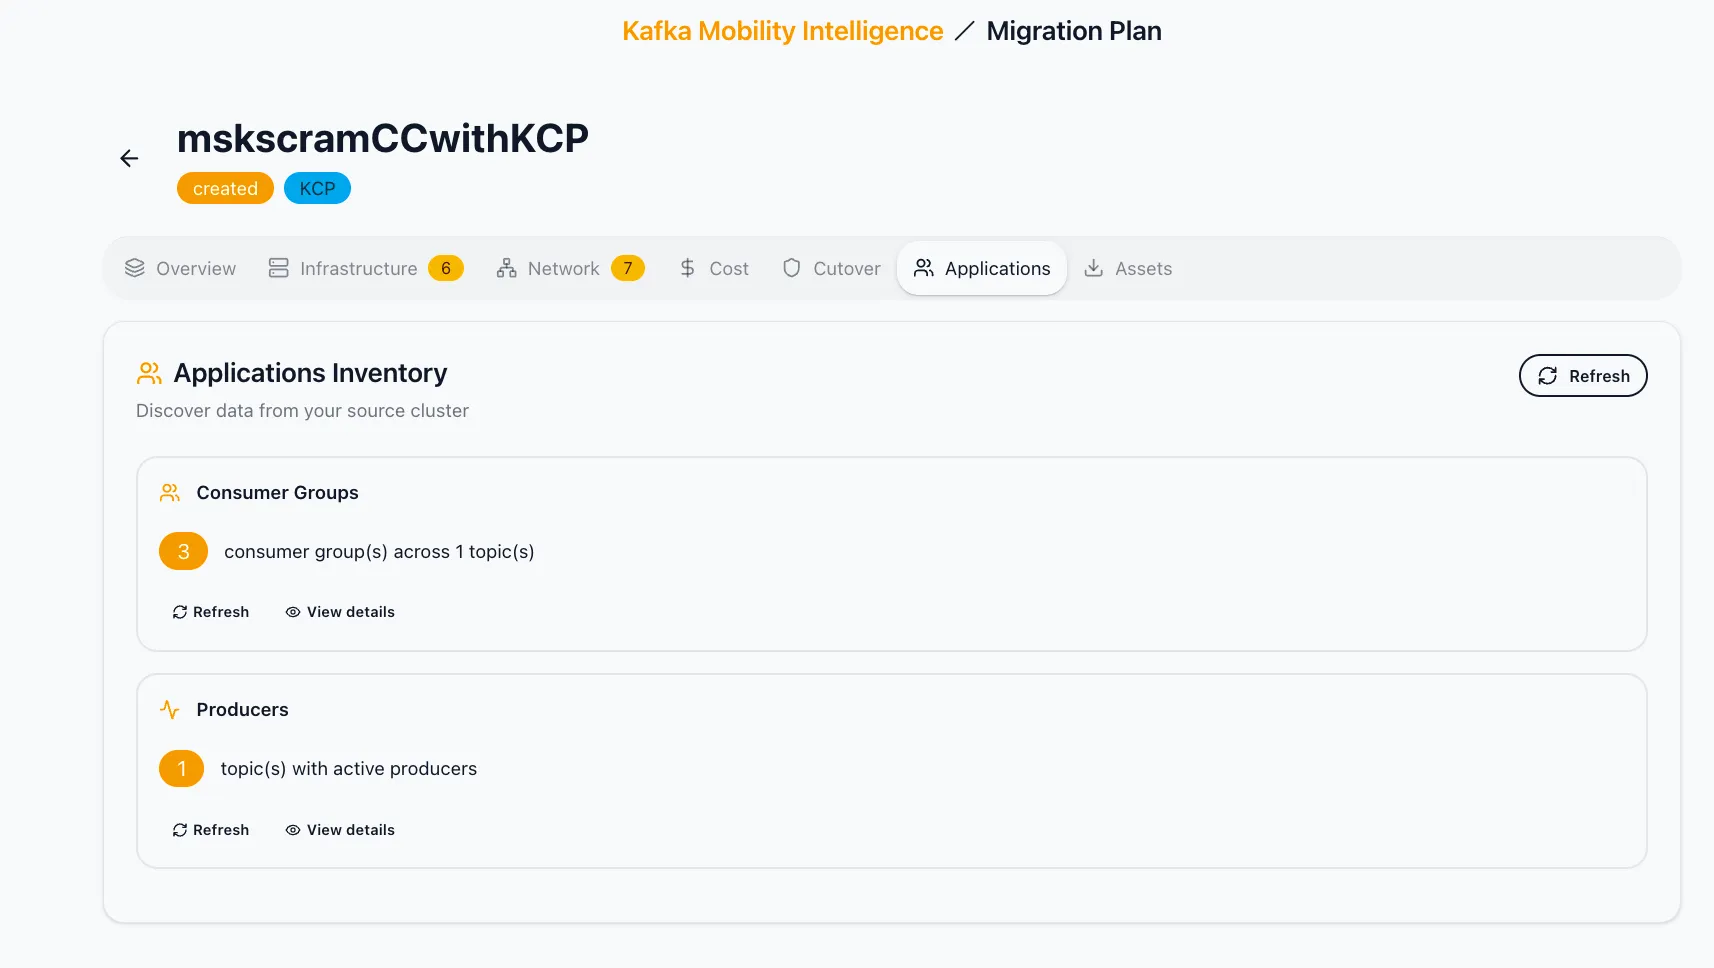
Section titled “Applications Tab”The Applications tab displays discovered and refreshed application dependencies tied to the source cluster.
Sections include:
- Consumer Groups: Groups consuming from source topics, with lag and membership details.
- Schemas: Schema subjects registered in the source Schema Registry.
- Producers: Applications producing to source topics.
- Connectors: Kafka Connect connectors interacting with the source cluster.
Assets Tab
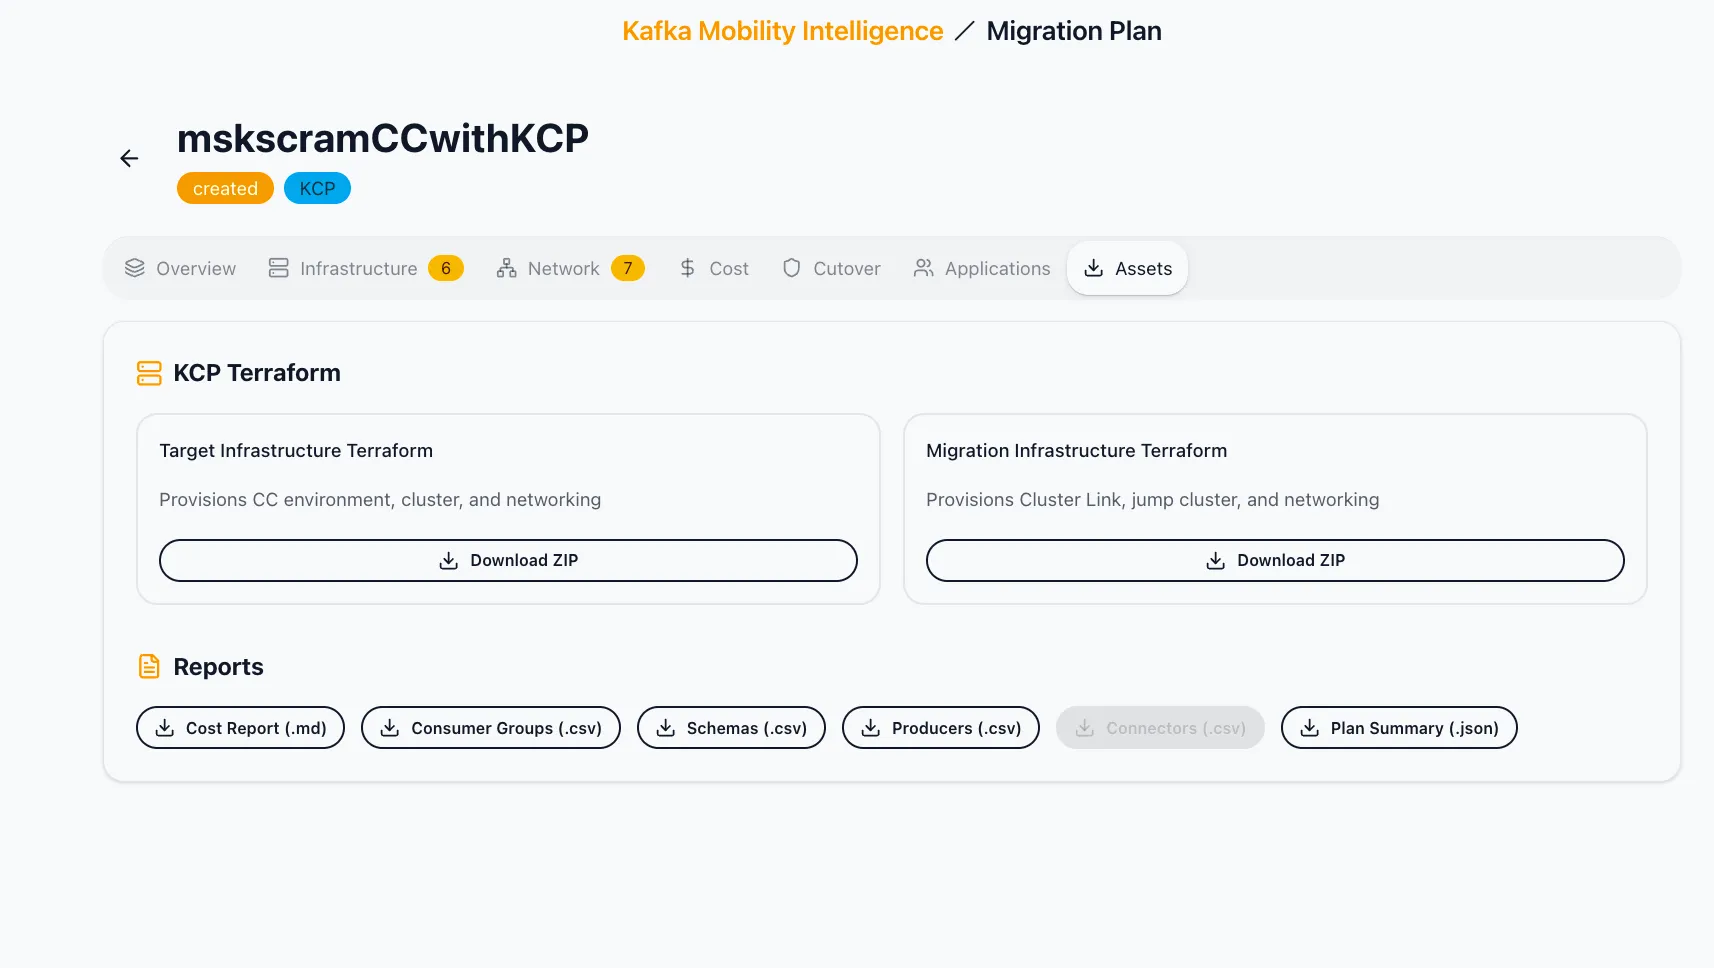
Section titled “Assets Tab”The Assets tab serves as a centralized resource hub with downloadable artifacts generated from the plan.
Available downloads:
| Asset | Description |
|---|---|
| Exported Plan Data | Full plan configuration in a portable format |
| Cost Report | Estimated costs for the migration based on scope and infrastructure |
| Application Inventory | Export of discovered applications, consumer groups, and producers |
| Connector Inventory | Export of Kafka Connect connectors associated with the source cluster |
| Schema Inventory | Export of schema subjects and compatibility settings |
| Gateway Assets | Gateway configuration files, TLS templates, and Docker Compose or Kubernetes manifests |
| Infrastructure Assets | Network diagrams, port mappings, and setup checklists |
| Terraform Packages | Pre-generated Terraform modules for provisioning destination infrastructure |
| SMT Sample Source (Cloudera sources) | Downloadable sample Java source for the Cloudera re-frame Single Message Transform. Present when the source uses Cloudera-native serialization. |
SMT Sample Source (Cloudera sources):
When the source uses Cloudera-native serialization, the Assets tab provides a downloadable sample Java SMT source file that you build into a jar and install on the Connect worker’s plugin path before the job starts.
The matching copyable SMT configuration block (transform class name and required properties) is on the plan’s Schemas tab. It appears when re-framing is required (Cloudera protocol 1, 2, or 3), and the class name in the block matches the class name in the sample source. Paste it into the MirrorMaker 2 or Replicator Transforms section.
When you create a migration job from a plan that recommends an SMT, the job wizard’s Transforms section in Advanced Settings is pre-filled with the recommended class name and properties (the value transform). You can edit these values before submitting.
Create a Job from the Plan
Section titled “Create a Job from the Plan”Once you have reviewed the plan and are satisfied with the guidance, you can create a migration job directly from the plan.
-
Open the plan from the Migration Plans tab.
-
On the Overview tab, click Create Migration Job.
-
The suite opens the job creation flow with plan inputs pre-applied to the configuration.
-
Review and refine the job settings as needed.
-
Submit the job to begin execution through the standard migration workflow.